Gluten Free Berry Tiramisu That’Ll Wow Everyone

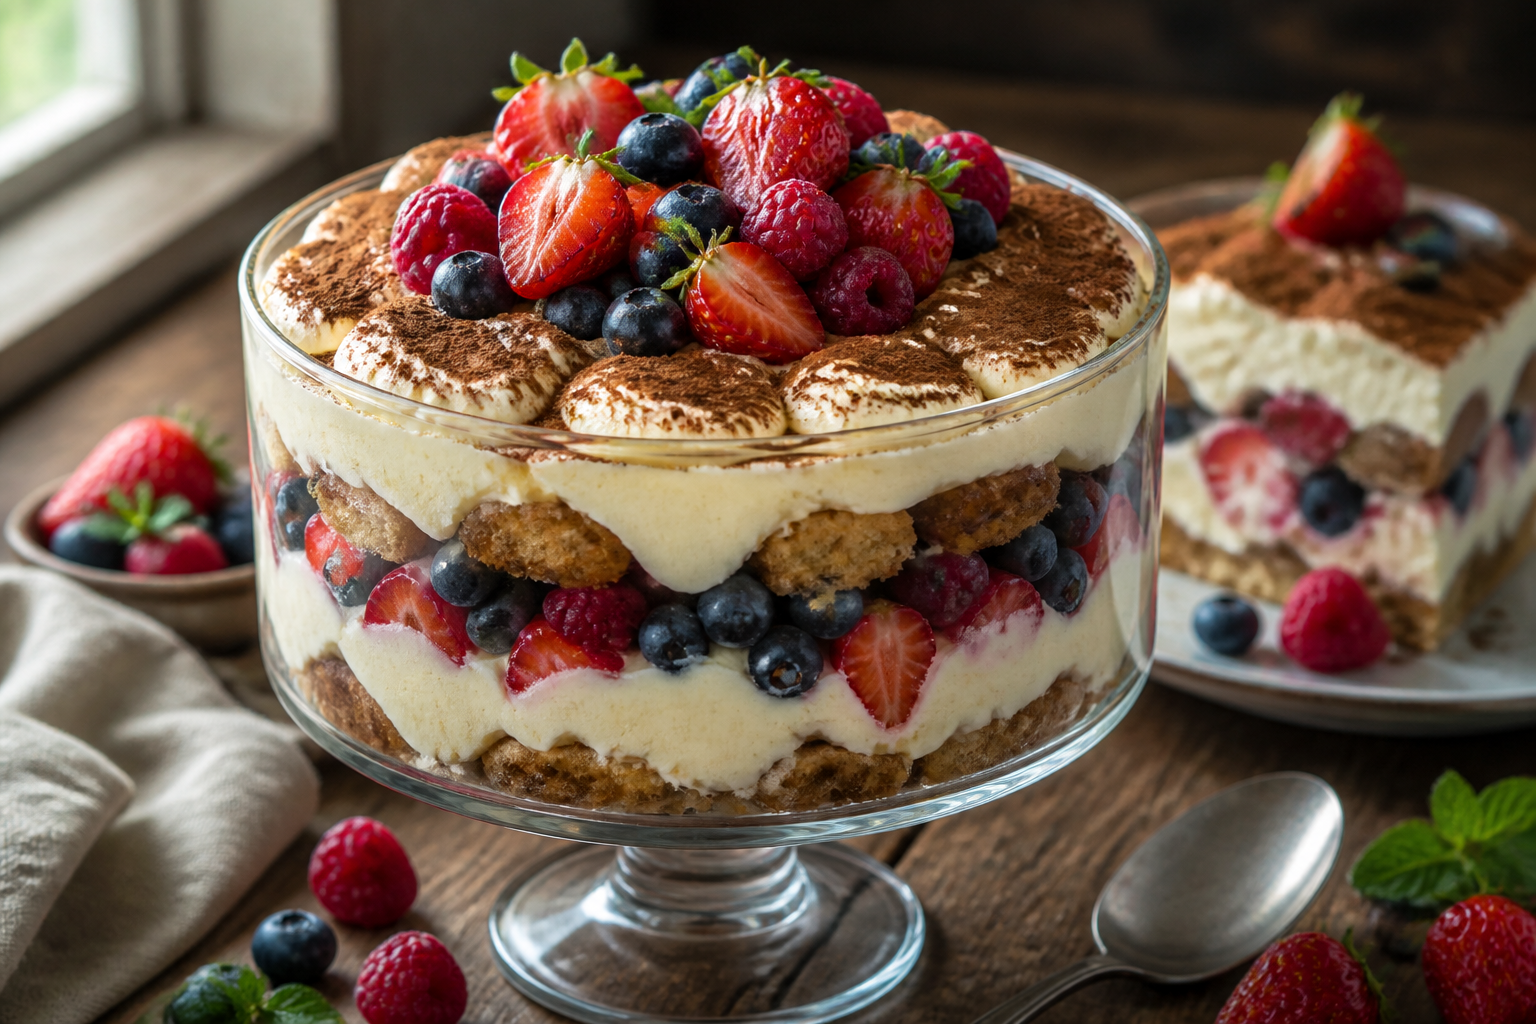
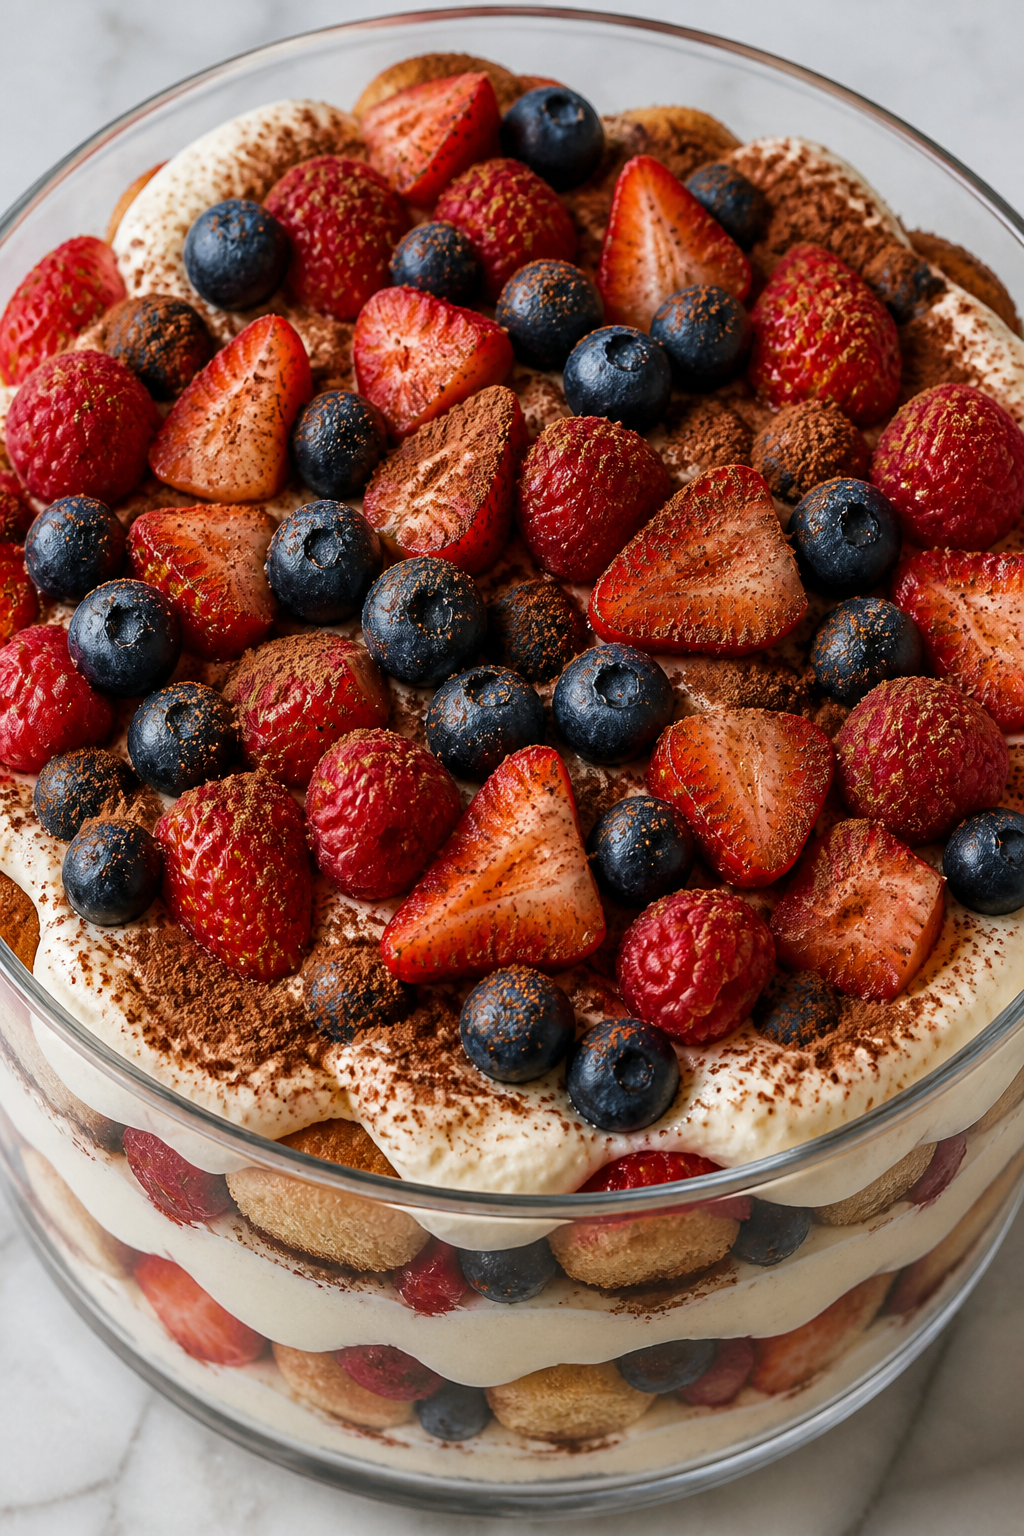
If you love tiramisu but need to avoid gluten, this berry version is about to become your new favorite dessert. We’re taking the classic Italian treat and giving it a fruity makeover with fresh berries and gluten-free ladyfinger cookies. The combination of creamy mascarpone, sweet berries, and coffee-soaked cookies creates something truly special. This recipe is perfect for summer gatherings, special occasions, or whenever you want to treat yourself to something indulgent without the gluten.

What Makes This Recipe So Good

This gluten-free berry tiramisu stands out because it delivers all the richness you expect from traditional tiramisu while adding a bright, fruity dimension. The berries cut through the richness of the mascarpone cream, making each bite feel lighter and more refreshing than the classic version.
The gluten-free ladyfingers work beautifully in this recipe, soaking up the coffee mixture just like regular ones. You won’t miss the gluten at all. The texture stays perfectly soft and creamy, with just enough structure to hold everything together.
What really sets this apart is how the berry juices mingle with the coffee and cream layers as it sits. This creates pockets of flavor throughout the dessert that make every spoonful a little different. It’s elegant enough to serve at dinner parties but simple enough to make on a weeknight.

Ingredients

A close-up overhead shot of a glass trifle dish filled with layers of creamy white mascarpone, coffee-soaked ladyfinger cookies, and fresh mixed berries including strawberries, blueberries, and raspberries, with a dusting of cocoa powder on top

For the cream layer:

  • 6 egg yolks
  • 3/4 cup granulated sugar
  • 1 1/3 cups mascarpone cheese, room temperature
  • 2 cups heavy cream, cold
  • 1 teaspoon vanilla extract

For the coffee mixture:

  • 1 1/2 cups strong brewed coffee, cooled
  • 3 tablespoons coffee liqueur (optional)
  • 2 tablespoons sugar

For assembly:

  • 24-30 gluten-free ladyfinger cookies
  • 2 cups mixed fresh berries (strawberries, raspberries, blueberries)
  • Cocoa powder for dusting
  • Extra berries for garnish

Step-by-Step Instructions

  1. Prepare the mascarpone mixture: Whisk together egg yolks and sugar in a heatproof bowl over simmering water. Stir constantly for about 5 minutes until the mixture thickens and reaches 160°F. Remove from heat and let it cool completely.
  2. Blend in the mascarpone: Once the egg mixture is cool, add the mascarpone cheese and vanilla extract. Whisk until smooth and well combined. Set aside.
  3. Whip the cream: In a separate bowl, beat the heavy cream until stiff peaks form. Gently fold the whipped cream into the mascarpone mixture in three additions. Be careful not to deflate the cream.
  4. Make the coffee mixture: Combine the cooled coffee, coffee liqueur if using, and sugar in a shallow dish. Stir until the sugar dissolves completely.
  5. Prep the berries: If using strawberries, hull and slice them. Leave smaller berries like raspberries and blueberries whole. Pat them dry with paper towels to remove excess moisture.
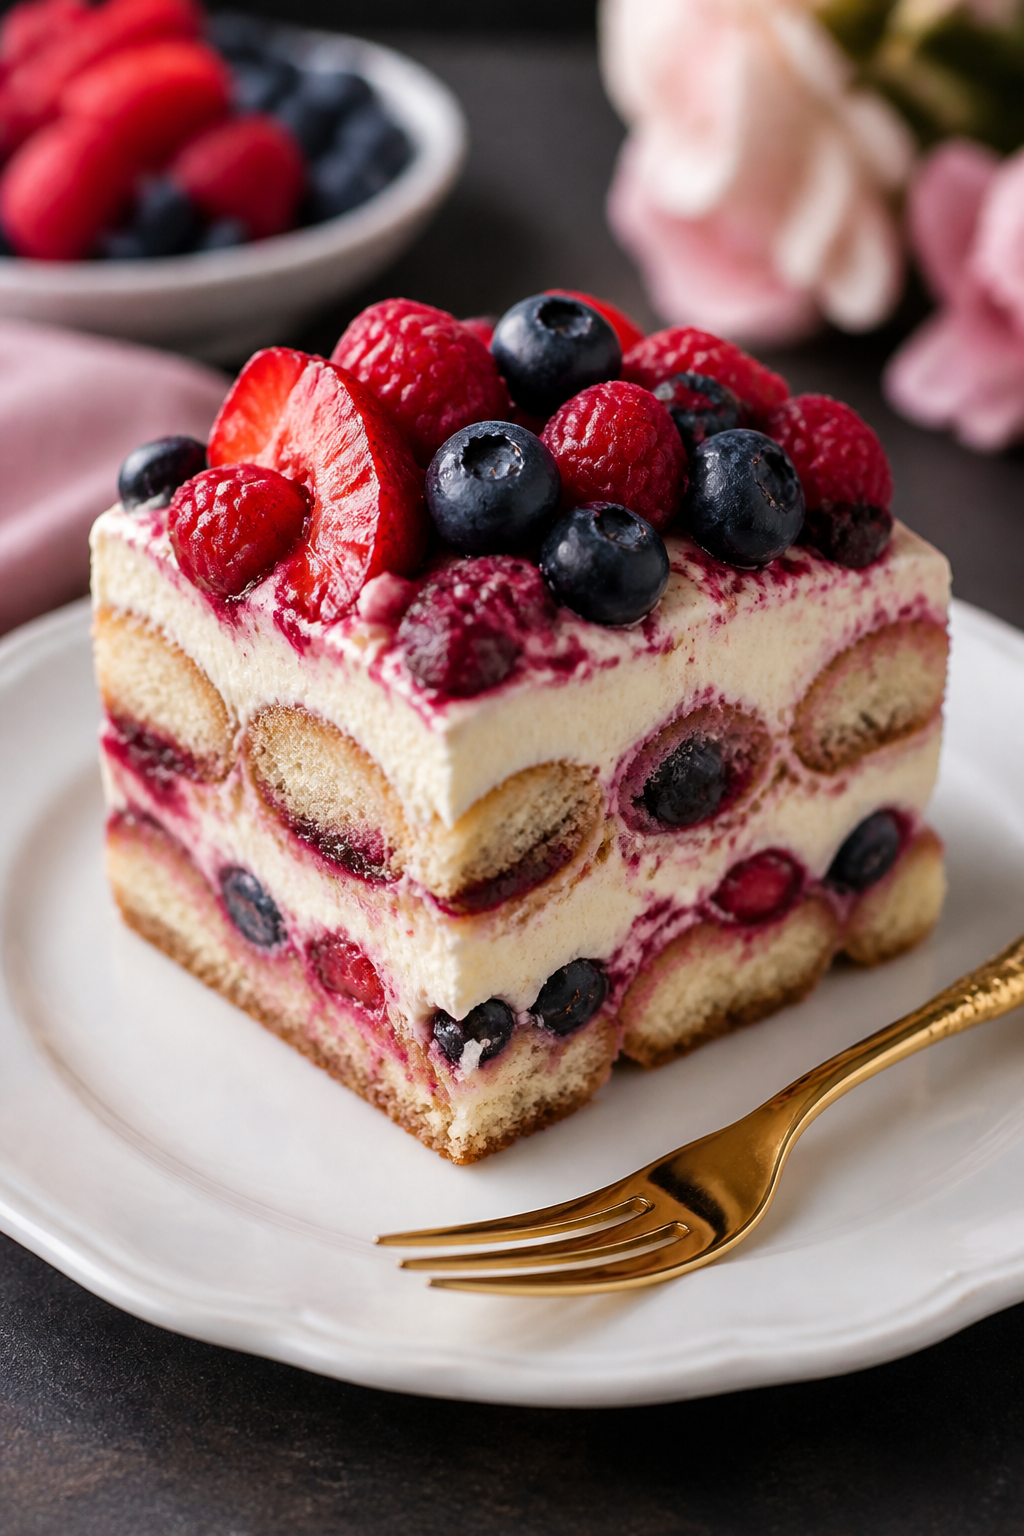
  6. Assemble the first layer: Quickly dip each ladyfinger into the coffee mixture for about 2 seconds per side. Arrange them in a single layer in a 9×13 inch dish.
  7. Add cream and berries: Spread half of the mascarpone cream over the ladyfingers. Scatter half of the berries evenly over the cream layer.
  8. Repeat the layers: Dip more ladyfingers in coffee and create a second layer. Top with the remaining cream and smooth it out with a spatula.
  9. Chill the dessert: Cover the dish with plastic wrap and refrigerate for at least 6 hours, or preferably overnight. This allows the flavors to meld together.
  10. Finish and serve: Before serving, dust the top with cocoa powder and arrange the remaining fresh berries on top for decoration.

Storage Instructions

An elegant slice of berry tiramisu on a white dessert plate showing distinct layers of mascarpone cream, soaked cookies, and vibrant red and blue berries, with a gold dessert fork beside it

Keep your gluten-free berry tiramisu covered tightly with plastic wrap in the refrigerator. It will stay fresh for up to 3 days, though it tastes best within the first 48 hours. The berries release some juice over time, which can make the texture a bit softer by day three.
Don’t freeze this dessert. The cream and mascarpone mixture doesn’t freeze well and will separate when thawed. The fresh berries also become mushy after freezing and thawing.
If you’re making this ahead for a party, assemble it the night before and add the cocoa powder and fresh berry garnish just before serving. This keeps everything looking fresh and prevents the cocoa from absorbing moisture.

Why This Is Good for You

While tiramisu is definitely an indulgent dessert, this version has some nutritional benefits worth noting. The fresh berries provide antioxidants, vitamin C, and fiber. Raspberries and blueberries are particularly high in beneficial compounds that support overall health.
The eggs in the mascarpone cream add protein and essential vitamins like B12 and selenium. Mascarpone cheese, while rich, provides calcium and vitamin A. Using quality ingredients means you’re getting real food rather than processed alternatives.
The coffee in this recipe offers its own benefits, including antioxidants and a small boost of caffeine. If you make this gluten-free for health reasons rather than preference, you’re avoiding potential inflammation and digestive issues associated with gluten sensitivity.

Common Mistakes to Avoid

A beautifully styled individual serving of berry tiramisu in a clear glass dessert cup showcasing the layered composition, topped with fresh whole berries and mint leaves, photographed against a soft pastel background

The biggest mistake people make is over-soaking the ladyfingers. Even gluten-free ones will turn to mush if you leave them in the coffee too long. A quick dip of about 2 seconds per side is all you need.
Don’t skip cooling the egg yolk mixture completely before adding the mascarpone. If it’s still warm, it will melt the mascarpone and create a runny mess instead of a thick, creamy filling.
Using cold mascarpone is another common error. Room temperature mascarpone blends much more smoothly and won’t create lumps in your cream. Take it out of the fridge about an hour before you start.
Overbeating the cream after folding it into the mascarpone will deflate it and make the filling dense. Use gentle folding motions and stop as soon as everything is combined.

Recipe Variations

Try using lemon curd between the layers for a lemon berry tiramisu. Just spread a thin layer over the cream before adding the berries. This adds a tangy brightness that’s absolutely delicious.
Swap the coffee for berry juice or berry tea for a completely caffeine-free version. Brew strong berry tea, sweeten it slightly, and use it exactly as you would the coffee mixture.
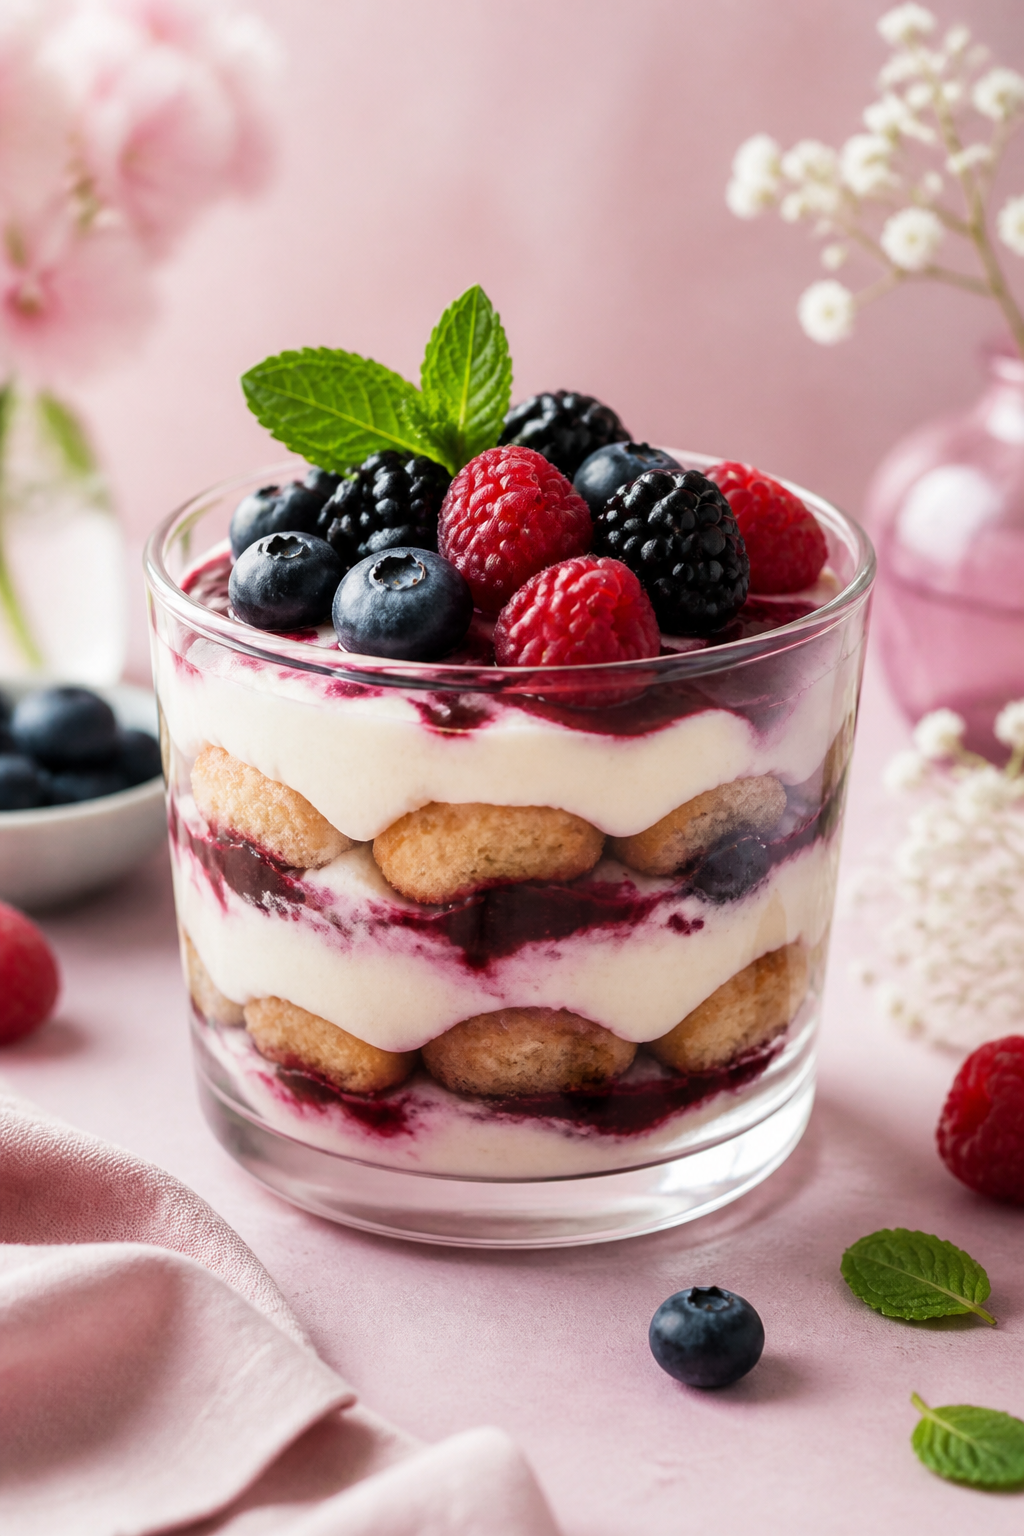
Make individual portions in small glasses or jars for a pretty presentation. Layer the components in clear containers so guests can see all the beautiful layers.
Add a layer of white chocolate shavings between the cream and berries for extra indulgence. The chocolate pairs wonderfully with both the cream and the fruit.

Frequently Asked Questions

Can I use frozen berries instead of fresh?

You can, but thaw them completely first and drain off all the excess liquid. Pat them very dry with paper towels. Fresh berries work better because frozen ones release more juice and can make the dessert watery.

What if I can’t find gluten-free ladyfingers?

You can substitute gluten-free sponge cake cut into strips. Some people also use gluten-free graham crackers, though the texture will be slightly different. Just make sure whatever you use can absorb the coffee mixture without falling apart.

Do I have to use mascarpone cheese?

Mascarpone gives tiramisu its authentic flavor and texture, so it’s really worth tracking down. In a pinch, you can blend cream cheese with heavy cream to approximate it, but the taste won’t be quite the same.

Is the coffee liqueur necessary?

Not at all. The coffee liqueur adds depth of flavor, but the dessert works perfectly fine without it. You can add a bit of vanilla extract to the coffee mixture if you want extra flavor without alcohol.

How do I know when the egg mixture is cooked enough?

Use a thermometer to check that it reaches 160°F. This ensures the eggs are safely pasteurized. The mixture should also coat the back of a spoon and look thick and pale yellow.

Can I make this dairy-free as well as gluten-free?

Making this both dairy-free and gluten-free is tricky because mascarpone is essential to tiramisu. You could try using coconut cream and dairy-free cream cheese, but the result will taste quite different from traditional tiramisu.

Final Thoughts

This gluten-free berry tiramisu proves that dietary restrictions don’t mean sacrificing flavor or elegance. The combination of creamy mascarpone, coffee-soaked cookies, and fresh berries creates a dessert that everyone will love, whether they need gluten-free options or not.
The recipe does require some time and patience, especially with the chilling period, but the actual hands-on work is straightforward. Once you make it a few times, you’ll find your rhythm and it becomes quite simple.
Serve this at your next gathering and watch it disappear. The fresh berries make it feel special and seasonal, while the classic tiramisu elements keep it familiar and comforting. It’s the perfect ending to any meal.

Gluten Free Banana Brownies

Look, I get it. You’ve got overripe bananas turning brown on your counter, and you’re trying to figure out what to do with them besides the same old banana bread. And if you’re gluten-free? The struggle is real. But here’s the thing: gluten free banana brownies with a honey-brown butter glaze might just become your new obsession. Trust me on this one.

Why These Banana Brownies Hit Different

Let me paint you a picture: moist, fudgy brownies that happen to use up those sad-looking bananas you’ve been ignoring. The best part? They’re naturally gluten-free, so you don’t have to feel like you’re missing out on anything.
The secret weapon here is combining bananas with a honey-sweetened brown butter glaze. Yeah, you read that right. We’re not just slapping regular frosting on these bad boys. We’re going full gourmet without the fussy chef nonsense.
Plus, those frozen bananas you’ve been hoarding? Perfect for this recipe. They actually work better because they get super mushy and blend seamlessly into the batter. So go ahead and feel validated about your banana-freezing habits.

Gathering Your Ingredients (Nothing Fancy Required)

Before you start, let’s talk about what you’ll need. The ingredient list is pretty straightforward, and you probably have most of this stuff already.

The Main Players

For the brownies themselves, you’ll need:

  • 2 cups gluten-free flour blend (your favorite mix works fine)
  • 1 teaspoon baking soda
  • 3/4 teaspoon salt
  • 1 stick of butter (room temperature)
  • 1 cup honey (or about 1.5 cups sugar if you prefer)
  • 2 eggs (room temperature matters here)
  • 1 cup sour cream
  • 2 teaspoons vanilla extract
  • 3 ripe bananas (the uglier, the better)
  • 1/2 cup pecans (or walnuts, almonds, whatever floats your boat)

For That Killer Glaze

The glaze is where things get interesting:

  • 1/2 cup butter (1 stick)
  • 1.5 cups honey (equivalent to about 4 cups powdered sugar)
  • 3-4 tablespoons cream cheese

Getting Your Prep Work Done

Here’s the deal with gluten-free baking: a little prep goes a long way. Start by preheating your oven to 375°F.
First things first, toast those pecans. Just spread them on a baking sheet and pop them in the oven. You’ll know they’re ready when your kitchen starts smelling amazing—usually about 8-10 minutes. Keep an eye on them because nobody likes burnt nuts.
While those are toasting, grab a jelly roll pan and butter it up. Then give it a light coating of gluten-free flour. Shake it around like you’re panning for gold, making sure you get all the corners and edges. This step might seem extra, but it’ll save you from the heartbreak of brownies stuck to the pan.

Mixing It All Together (AKA The Fun Part)

Close-up overhead shot of fudgy chocolate brownies with a glossy honey-brown butter glaze drizzled on top, with three overripe bananas with brown spots placed beside the brownies on a rustic wooden countertop

Time to get your hands dirty. Well, not literally—you’ve got a mixer for that.

The Dry Ingredients

In one bowl, whisk together your gluten-free flour, baking soda, and salt. That’s it. Set it aside and forget about it for a minute.

The Wet Ingredient Magic

In your mixing bowl, beat that stick of room-temperature butter until it’s light and fluffy. Add the honey and mix until combined. FYI, if you’re using sugar instead, just swap it in at this point.
Now crack in those eggs one at a time, mixing after each addition. The mixture might look a little weird and separated—don’t panic. That’s totally normal.
Add the sour cream, vanilla, and those mushy bananas. Here’s a pro tip: if your bananas were frozen, they’ll be super liquidy when thawed. That’s actually perfect because it means you don’t need the extra egg you’d normally add to gluten-free baked goods.

Bringing It All Together

Gradually fold in your dry ingredients. You’re not trying to develop gluten here (spoiler alert: there isn’t any), but you also don’t want to overmix. Just blend until everything looks uniform.
Chop up those toasted pecans—chunky or fine, your call—and fold them into the batter. Pour everything into your prepared pan and spread it out evenly. It’ll look thin, but trust the process. These babies will puff up in the oven.

Baking and the Brown Butter Glaze Situation

Pop your pan in the oven for 20-25 minutes. You’re looking for golden edges and a springy top when you gently press it. While those brownies work their magic, let’s talk about this glaze.

Making Brown Butter Like a Boss

Brown butter sounds fancy, but it’s actually dead simple. Melt a stick of butter in a saucepan over medium heat and just keep stirring. You’re waiting for the milk solids to turn a gorgeous amber color.
Watch it carefully because there’s a fine line between “perfectly browned” and “oops, I burned it.” Once it hits that golden-brown sweet spot, take it off the heat immediately.

Creating the Glaze

Whisk in about 1.5 cups of honey to your brown butter. Yeah, it’ll look separated and weird at first. Keep whisking—it’ll come together.
Now here’s the secret ingredient: cream cheese. Add it a tablespoon at a time, using the residual heat to melt it. This thickens the glaze and cuts through some of that sweetness. You’ll end up with more glaze than you need for the brownies, but IMO, that’s a feature, not a bug. Hello, ice cream topping.

The Assembly and Waiting Game

When your brownies come out of the oven, let them cool for about 15 minutes. You want them still slightly warm but not scorching hot.
Pour your glaze over the top while everything’s still a bit warm. The heat will help it soak in and create this incredible fusion of flavors. Don’t use all the glaze unless you want soup—just drizzle enough to cover the top generously.
Spread it around gently (try not to stab the brownies like a maniac), and then comes the hardest part: waiting. Let everything cool to room temperature before cutting. The glaze needs time to set up, and cutting too early will give you a messy situation.

Storage Tips That’ll Save Your Life

Once these brownies are completely cool, store them in the fridge. Gluten-free baked goods actually do better in cold storage anyway—they stay fresher longer and maintain that perfect texture.
They’ll firm up a bit in the fridge, which honestly makes them even better. Cold brownies with that slightly firm glaze? Chef’s kiss.
You can keep these refrigerated for about a week, but good luck making them last that long. In my experience, they disappear within a couple of days.

Frequently Asked Questions

Can I use regular flour instead of gluten-free?

Absolutely! If you’re not gluten-free, you can swap in regular all-purpose flour using the same measurements. You might want to add that extra egg back in though, since regular flour doesn’t need quite as much moisture as gluten-free blends.

What if I don’t have honey?

No problem. Use about 1.5 cups of regular granulated sugar for the brownies and 4 cups of powdered sugar for the glaze. The flavor profile will be slightly different, but they’ll still taste amazing.

Do the bananas really need to be that ripe?

Yes! The browner and spottier, the better. Super ripe bananas are sweeter and have more flavor. Freezing them actually speeds up the ripening process, so don’t be afraid to use those questionable-looking frozen ones.

Can I skip the nuts?

Of course. Not everyone’s a nut person, and that’s fine. The brownies will be just as delicious without them. You could also substitute chocolate chips if you’re feeling extra indulgent.

Why does my glaze look separated?

Don’t stress about it. Keep whisking and the residual heat will help it come together. Even if it stays slightly separated, once you pour it over warm brownies, everything will meld together beautifully.

How do I know when the brownies are done?

Look for golden brown edges and a top that springs back when you gently press it. A toothpick inserted in the center should come out mostly clean with maybe a few moist crumbs—but not wet batter.

Final Thoughts on These Game-Changing Brownies

Listen, I’ve tried a lot of gluten-free desserts that taste like cardboard trying to masquerade as a treat. These banana brownies are not that. They’re moist, flavorful, and that brown butter glaze takes them from “pretty good” to “I’m making these every weekend.”
The best part? You’re using up ingredients you probably already have lying around. Those bananas aren’t going to rescue themselves, and now you’ve got the perfect excuse to transform them into something spectacular.
Whether you’re gluten-free by necessity or choice, or just looking for a killer way to use up ripe bananas, this recipe deserves a spot in your regular rotation. Make a batch this weekend and thank me later.

Low Carb, High Protein Dessert- Low Calorie Chocolate Delight

If you crave something chocolatey but want to keep it high-protein and low-carb, you’re in for a treat. This recipe is cheap, quick, and surprisingly elegant. It tastes like a rich chocolate pudding but sneaks in smart nutrition, perfect for blood sugar control and weight goals.

Let’s dive in and make your kitchen the hero of dessert.

Ingredient Essentials: What You’ll Need

5 eggs as the protein powerhouse
– They supply most of the protein and healthy fats, plus a bunch of nutrients, including a natural vitamin D boost in the yolk.

1 & 2/3 cup (400g) plain unsweetened yogurt
– Adds creaminess and a protein punch. If you’re into DIY, there’s a quick homemade yogurt method linked in the video description.

Baking sweetener (to taste).
– Keeps blood sugar in check and makes the sweetness easy to control. You can substitute with sugar alternatives like brown sugar or demerara, but the recipe shines with a baking sweetener to avoid spikes.

3 tablespoons 100% cocoa powder
– Deep, rich chocolate flavor and a fiber/antioxidant boost.

Optional topping: A sprinkle of 70% chocolate shavings for presentation and extra indulgence.

Step-by-Step Cooking Method

A glossy, rich chocolate pudding in a chic glass dessert cup, topped with a delicate dusting of cocoa powder, alongside a small bowl of unsweetened plain yogurt and a spoon of baking sweetener, all set on a clean kitchen countertop with warm ambient lighting.

– Whip up the batter: Combine eggs, yogurt, baking sweetener, and cocoa powder. A hand mixer works great, but a blender or whisk will do the job if you’re feeling old-school.
– Bake au bain-marie (water bath): Pour the mixture into a silicone pan, place that pan inside a larger dish, fill the outer pan with boiling water, cover with foil shiny side in, and bake gently at 360°F. The steam keeps everything even and prevents overcooking.
(Watch the video above to see how it’s done!)
– Patience pays off: The dessert needs about 45 minutes in the oven. Pro tip: keep an eye on texture; you want it set, with a smooth, pudding-like consistency.
– Finish with flair: Optional 70% chocolate shavings on top add a glossy finish and a little extra bite.

Texture and Flavor: What You’ll Taste

– It’s rich and chocolatey without being heavy. The cocoa brings fiber and antioxidants, while the eggs and yogurt deliver creaminess and protein.
– The result resembles a luxurious chocolate pudding, but with the added benefit of being low carb and high protein. FYI, you’ll get a smooth, silky texture that bites back nicely with a gentle wobble.

Nutritional Perks: Why This Works

A modern, airy kitchen scene featuring a plated dessert in a shallow glass dish, showing a layered chocolate-yogurt dessert with a glossy surface, beside a jar labeled “100% cocoa powder” and a small bowl of yogurt, captured with natural light and a shallow depth of field.

– High protein, low carbs: Eggs are the star protein source; yogurt contributes additional protein with a creamy mouthfeel.
– Blood sugar friendly: Using a baking sweetener helps prevent sugar spikes, making this dessert friendlier for those watching their glucose levels.
– Energy-boosting fats: The yolk provides healthy fats and nutrients like choline and vitamin D, rarely found in many dessert options.

Flavor Variations and Personal Tweaks

– Cocoa quality matters: Use a high-quality 100% cocoa powder for maximum flavor and fiber benefits.
– Sweetener swaps: If you don’t have a baking sweetener, you can try brown sugar or demerara, but be aware of potential blood sugar impact. The original approach prioritizes control without sacrificing taste.
– Top it off: A sprinkle of chocolate shavings is optional but gives a finishing touch that makes it feel special. Do you decorate desserts, or are you minimal about toppings? Share your style in the comments.

Texture Checks and Troubleshooting

– If your pudding is too runny: Your bath might have been too gentle or the oven temperature uneven. Let it set a bit longer and ensure the water bath stays consistent.
– If it’s too firm: You may have cooked it a touch too long. A shorter bake time or a lighter hand with the batter can help next time.
– Want more creaminess: A touch more yogurt or a quick whisk can tighten the texture without adding carb load.

Tips for a Everyday Quick Dessert Routine

– Prep ahead: The yogurt base can be mixed and refrigerated ahead of time; bake day-of for the best texture.
– Portion control: Pour into individual silicone molds for easy single-serving portions, perfect for meal planning.
– Make it family-friendly: This dessert doubles as a protein-rich after-dinner treat that kids and adults alike can enjoy.

Subsection: Why Eggs Are Your Best Friends Here

– They provide most of the protein and healthy fats in the recipe.
– They bring a variety of nutrients, including choline and vitamin D from the yolk.
– Their versatility helps you tailor the texture and richness of the final product.

Subsection: Yogurt’s Role in Creaminess

– Yogurt adds a tangy creaminess that balances the cocoa’s depth.
– It also boosts protein content, making the dessert more satiating.
– If you’re making yogurt at home (recipe linked in description), you’ll appreciate control over ingredients and quality.

FAQ: Quick Answers to Common Questions

Is this dessert really low in carbs?

Yes. The base relies on eggs, yogurt, and cocoa with a sugar substitute to minimize carbohydrate load, delivering a satisfying chocolate experience without a sugar spike.

Can I use regular sugar instead of a baking sweetener?

You can, but it may cause blood sugar spikes. The recipe notes that a baking sweetener helps avoid these spikes and keep the dessert aligned with low-carb goals.

What’s the best way to serve this dessert?

Chill it briefly for a firmer pudding-like texture, or serve warm for a more molten-style dessert. A few chocolate shavings on top elevate the presentation.

Can I customize sweetness level?

Absolutely. Start with less sweetener, then taste and adjust. The baking sweetener option is there to help you dial in the exact sweetness you want.

How does the water bath affect texture?

The water bath cooks the dessert gently and evenly, preventing a crackly edge and helping maintain a silky, pudding-like center.

Conclusion: A Guilt-Free Chocolate Dream You Can Actually Make

This low carb, high-protein chocolate dessert proves you don’t need to sacrifice flavor to stay on track with your health goals. It’s quick, budget-friendly, and adaptable to your taste buds and dietary needs. Whether you’re counting macros, chasing steady blood sugar, or just craving something chocolatey, this dessert nails it.

Ready to try it tonight? Grab the ingredients, bake, and enjoy a treat that feels indulgent without derailing your health plan. Let me know how you customize yours, and don’t forget to share this recipe with friends who deserve a chocolaty, protein-packed dessert too.

How To Boost Your Protein With Plants: Top 10 High-Protein Vegetables Ranked

Think you need meat to hit your protein goals? Think again. These 10 vegetables pack serious protein, and I’m ranking them from good to absolutely incredible so you can load up your plate strategically.

Whether you’re going fully plant-based or just trying to eat more veggies, you’re about to discover which greens deserve the MVP spot on your dinner plate. No BS, no filler—just the cold, hard protein facts that’ll change how you grocery shop forever.

1. The Underdog: Green Peas (8.6g Per Cup)

Item 1

Don’t sleep on these tiny green spheres. Frozen peas are hiding in plain sight in your freezer section, quietly packing more protein than most people realize.

A single cup of cooked green peas delivers nearly 9 grams of protein. That’s more than an egg! Plus, they’re ridiculously versatile—toss them in pasta, blend them into soup, or just heat and eat as a side dish.

Why Peas Deserve Your Attention:

  • Cheap as chips and available year-round frozen
  • Cook in under 5 minutes straight from frozen
  • Loaded with fiber to keep you full
  • Sweet enough that even picky eaters tolerate them

The best part? You can add peas to literally anything without changing the flavor profile too much. They’re the protein ninja of the vegetable world.

2. The Leafy Powerhouse: Spinach (5.3g Per Cooked Cup)

Item 2

Popeye wasn’t messing around. Spinach transforms from a massive pile of leaves to a tiny, protein-dense serving when you cook it down.

Here’s the trick: raw spinach contains only about 1 gram of protein per cup. But cook that same spinach, and you can fit way more into a single serving. A cooked cup gives you over 5 grams of protein along with iron, calcium, and vitamins A and K.

Seriously, sauté a giant bag of spinach with garlic, and it’ll shrink down to maybe two servings. Add it to eggs, smoothies (you won’t taste it, trust me), pasta, or curry. The possibilities are endless, and your protein intake will thank you.

Pro Tips:

  • Buy frozen spinach for maximum convenience and nutrition
  • Squeeze out excess water after cooking for better texture
  • Pair with vitamin C foods to boost iron absorption

Spinach is basically the vegetable equivalent of a multivitamin with a protein bonus attached.

3. The Crunchy Champion: Broccoli (4.3g Per Cooked Cup)

Item 3

This tree-shaped vegetable is a bodybuilder favorite for a reason. Broccoli brings solid protein numbers while being incredibly low in calories.

One cup of cooked broccoli gives you over 4 grams of protein and only about 55 calories. The protein-to-calorie ratio here is genuinely impressive. Plus, you get a massive dose of vitamin C—like, more than an orange level of vitamin C.

Roast it until the edges get crispy and slightly charred. Steam it and drizzle with tahini. Blend it into soup. Add it to stir-fries. Broccoli is that reliable friend who shows up and delivers every single time.

Cooking Methods That Maximize Flavor:

  • Roasting: High heat (425°F) until edges brown
  • Steaming: Keeps nutrients intact, takes 5 minutes
  • Stir-frying: Quick cook with garlic and ginger

IMO, roasted broccoli with a sprinkle of nutritional yeast is basically vegetable crack. You’ll actually crave it.

4. The Sophisticated Choice: Asparagus (4.3g Per Cooked Cup)

Item 4

Fancy restaurants charge you extra for this, but you can easily make it at home and reap those protein benefits.

Asparagus ties with broccoli at about 4.3 grams of protein per cooked cup, but it brings a different nutritional profile to the table. It’s loaded with folate, vitamin K, and antioxidants that support everything from your heart to your gut health.

The tender spears cook quickly and taste amazing with just a bit of olive oil, salt, and lemon. Grill them, roast them, or wrap them in literally anything. They’re the vegetable that makes you feel like you have your life together.

Selection and Storage:

  • Look for firm stalks with tight tips
  • Store upright in water (like flowers) to keep fresh
  • Snap off the woody ends before cooking

Asparagus season (spring) is when these babies are cheapest and tastiest, so stock up and eat them daily when they’re in season.

5. The Brussels Sprouts Comeback: (4g Per Cooked Cup)

Item 5

Remember when everyone hated Brussels sprouts? Yeah, that’s because everyone was boiling them into oblivion. Properly cooked Brussels sprouts are a game-changer.

Four grams of protein per cup might not sound earth-shattering, but combine that with their high fiber content and you’ve got a seriously satisfying vegetable. They’ll keep you full for hours.

Cut them in half, toss with oil, and roast at high heat until the outer leaves get crispy and caramelized. The transformation is magical. Add balsamic glaze or maple syrup for that sweet-savory combo that makes people ask for the recipe.

Why They Work:

  • High fiber means they’re incredibly filling
  • Roasting brings out natural sweetness
  • Packed with vitamin C and K
  • Actually taste good when cooked right

Brussels sprouts have had a major reputation rehab in recent years, and they’ve earned it. Give them another chance if you haven’t already.

6. The Misunderstood Green: Kale (3.5g Per Cooked Cup)

Item 6

Yes, kale became a meme. Yes, it was overhyped for a while. But you know what? The protein content is still legit.

Cooked kale delivers about 3.5 grams of protein per cup along with more vitamin K than you could possibly need in a day. It’s also stupidly versatile—use it anywhere you’d use spinach, but it holds up better to heat and doesn’t wilt down as much.

The secret to good kale is removing those tough stems and either massaging raw kale with lemon and oil or cooking it until tender. Nobody likes chewy, bitter kale, but properly prepared kale is actually delicious.

Best Kale Varieties:

  • Lacinato (Dinosaur) Kale: Tender, less bitter
  • Curly Kale: Great for chips and hearty soups
  • Baby Kale: Perfect for salads, no massage needed

Add it to smoothies, soups, pasta, or make kale chips. FYI, kale chips are weirdly addictive when you season them right.

7. The Summer Star: Sweet Corn (4.7g Per Cooked Cup)

Item 7

Plot twist: corn is technically a grain, but it’s sold as a vegetable and it’s making this list because the protein content deserves recognition.

A cup of cooked sweet corn gives you nearly 5 grams of protein. Not too shabby for something that tastes like summer in vegetable form. Yeah, it’s higher in carbs than leafy greens, but those carbs give you energy and the fiber keeps things moving.

Grill it, boil it, cut it off the cob and add it to salads, salsas, and grain bowls. Frozen corn is perfectly fine nutritionally and way more convenient than fresh. Don’t let corn snobs tell you otherwise.

Quick Serving Ideas:

  • Toss with lime, chili powder, and vegan mayo (elote style)
  • Add to black bean tacos for extra protein
  • Blend into chowder for creamy texture

Corn gets unfairly dismissed by low-carb enthusiasts, but it’s a solid plant protein source that actually tastes good.

8. The Comfort Food: Mushrooms (3.9g Per Cooked Cup)

Item 8

Okay, mushrooms are technically fungi, not vegetables. But they live in the produce section and they’re bringing impressive protein numbers, so they’re making the cut.

Different varieties pack different amounts, but portobello and shiitake mushrooms can deliver around 4 grams of protein per cooked cup. They’re also one of the few plant foods with vitamin D, especially if they’ve been exposed to UV light.

The umami flavor in mushrooms makes everything taste meatier and more satisfying. Slice them thick, cook them until golden, and use them in place of meat in tacos, burgers, or pasta. The texture is surprisingly convincing.

Best High-Protein Varieties:

  • Portobello: Meaty texture, grill them whole
  • Shiitake: Deep flavor, great for Asian dishes
  • Oyster: Tender and mild, cooks quickly

Don’t wash mushrooms under running water—they’ll get soggy. Just brush them off with a damp cloth and get cooking.

9. The Dark Horse: Artichokes (4.8g Per Cooked Cup)

Item 9

Artichoke hearts from a jar or can are absolute protein heroes that nobody talks about enough.

One cup of cooked artichoke hearts delivers nearly 5 grams of protein plus a ton of fiber that’ll keep you full for ages. They’re also loaded with antioxidants and prebiotics that feed your good gut bacteria.

Toss them in pasta, add them to pizza, blend them into dips, or just eat them straight from the jar if you’re into that (no judgment). They bring this tangy, slightly nutty flavor that elevates everything they touch.

Easy Ways to Use Them:

  • Chop and add to grain bowls
  • Blend into creamy pasta sauce
  • Layer on flatbread with vegan cheese
  • Mix into spinach dip for double protein

Fresh whole artichokes are delicious but intimidating. Start with the jarred or canned hearts and work your way up to the fresh stuff when you’re feeling adventurous.

10. The Plot Twist: Potatoes (4.3g Per Large Potato)

Item 10

Surprise! That medium-to-large baked potato you’ve been avoiding actually has over 4 grams of protein. Mind. Blown.

Potatoes got villainized by diet culture, but they’re actually nutrient-dense powerhouses with protein, potassium, vitamin C, and fiber (especially if you eat the skin). A large baked potato with skin can deliver more protein than a cup of milk.

The key is how you prepare them. Baked, roasted, or air-fried potatoes are nutritious comfort food. Deep-fried or loaded with butter and sour cream? Not so much. But a baked potato topped with beans, veggies, and salsa? That’s a high-protein meal right there.

Protein-Boosting Potato Ideas:

  • Loaded Baked Potato: Top with beans, broccoli, nutritional yeast
  • Breakfast Hash: Dice and cook with peppers, onions, tofu
  • Mashed Potatoes: Mix in white beans for extra creaminess and protein

All potato varieties work—russet, red, sweet, purple. They all bring solid nutrition to the table. Stop being scared of carbs and start appreciating what potatoes can do for your protein goals.

There you have it—your ultimate roadmap to hitting protein goals without touching a single piece of meat. Load up your plate with these vegetables, combine them strategically, and watch your protein numbers climb. Your body (and maybe the planet) will thank you for making plants the star of your meals.

What Exactly is Protein Coffee, anyway?

Your morning coffee just met its match, and it’s packing some serious muscle. Protein coffee is exactly what it sounds like – your beloved caffeine fix turbocharged with protein powder – and it’s taking over gym bags and kitchen counters everywhere. Think of it as your high-protein breakfast and coffee ritual all rolled into one delicious cup.

Let’s dive into why this combo is genius and how you can make it happen at home.

Why Protein Coffee Is Actually Brilliant

Look, I get it. At first glance, mixing protein powder into coffee sounds like something a fitness influencer made up at 5 AM after too many burpees. But hear me out – this combo makes way more sense than you’d think.

Your body needs protein to function, build muscle, and keep you feeling full. Coffee gives you that energy boost and mental clarity to actually get through your day. When you combine them, you’re basically creating a multitasking superhero beverage that handles breakfast and your caffeine addiction in one go.

The metabolism boost is real. Caffeine revs up your metabolic rate, while protein requires more energy to digest than carbs or fats. Together, they’re like a tag team for your metabolism, keeping it fired up longer than either would alone.

Plus, let’s talk about the convenience factor. We’re all trying to juggle seventeen things before 9 AM, right? Protein coffee means one less meal to prep, one less shake to clean up, and one less excuse for skipping breakfast entirely.

The Science-Backed Benefits You’ll Actually Notice

Close-up overhead shot of protein powder being poured from a scoop into a steaming cup of black coffee, creating swirling patterns as it dissolves, with coffee beans scattered around the mug

Muscle Recovery and Growth

If you work out, protein coffee becomes your secret weapon. Getting protein within that post-workout window helps your muscles recover faster and grow stronger. Add coffee’s anti-inflammatory properties to the mix, and you’re looking at reduced muscle soreness.

The caffeine also improves your physical performance by mobilizing fatty acids from fat tissues, making them available as energy. Translation? You might actually crush that last set instead of limping through it.

Sustained Energy Without The Crash

Regular coffee on an empty stomach? That’s a one-way ticket to Jitter City, population: you, at 11 AM, wondering why you feel like garbage. Protein slows down caffeine absorption, which means you get a smoother, longer-lasting energy boost instead of that spike-and-crash rollercoaster.

The protein also stabilizes your blood sugar levels, preventing that mid-morning slump where you’d normally face-plant into a box of donuts. Your energy stays more consistent throughout the day, which honestly feels like a superpower.

Appetite Control That Actually Works

Here’s something cool: protein is incredibly satiating. When you start your morning with protein coffee, you’re triggering the release of hormones that tell your brain “Hey, we’re good on food for now.” This isn’t some fad diet trick – it’s actual science.

I’m talking about staying full for hours without thinking about snacks every fifteen minutes. You know that 10 AM hunger that usually has you raiding the snack drawer? Yeah, protein coffee laughs in the face of that.

Brain Function Gets A Double Boost

Caffeine sharpens your focus and improves reaction time – no surprise there. But protein provides amino acids that your brain needs to produce neurotransmitters. Together, they enhance cognitive function, mood, and mental clarity better than either one alone.

It’s like upgrading from regular WiFi to fiber optic – your brain just works better.

How To Make Protein Coffee At Home Like A Pro

Making protein coffee isn’t rocket science, but there are definitely right ways and wrong ways to do it. Let me save you from the mistakes I made when I first started.

The Basic Method

Here’s your foolproof starting point:

  1. Brew your coffee however you normally do – French press, drip, espresso, whatever
  2. Let it cool for a minute or two (crucial step, don’t skip this)
  3. Add one scoop of protein powder to your blender
  4. Pour in the slightly cooled coffee
  5. Blend for 15-20 seconds until smooth and frothy

Why the blender? Because if you just stir protein powder into hot coffee, you’ll get clumpy, sad-looking chunks floating around. Nobody wants to drink that. The blender creates a smooth, almost latte-like texture that’s actually enjoyable.

The Iced Protein Coffee Game-Changer

This is where things get fun. Iced protein coffee is phenomenal, especially in summer:

  • Brew strong coffee and let it cool completely (or use cold brew)
  • Add protein powder, ice, and a splash of milk to your blender
  • Blend until you get that smooth, frothy consistency
  • Pour over more ice if you want it extra cold

FYI, cold brew works better for this than hot coffee that you’ve cooled down. The flavor is smoother and less acidic.

Pro Tips For Next-Level Protein Coffee

Want to level up? Here’s what the protein coffee veterans know:

  • Choose the right protein powder. Vanilla and chocolate work best with coffee. Unflavored is fine if you like your coffee black and bitter. Those weird flavors like birthday cake or cookies and cream? Skip them unless you’re feeling adventurous.
  • Add healthy fats for extra creaminess. A teaspoon of MCT oil, coconut oil, or even a tablespoon of nut butter makes your protein coffee taste ridiculously indulgent. Plus, the fats help you absorb fat-soluble vitamins and keep you even fuller.
  • Experiment with spices. Cinnamon, nutmeg, and cocoa powder transform your basic protein coffee into something that tastes like you paid $8 at a fancy café. A tiny pinch of sea salt can also enhance the flavor.
  • Try adding collagen peptides along with your regular protein powder. They dissolve better and add extra benefits for your skin, hair, and joints without affecting the taste.

Best Protein Coffee Products To Buy Online

Split-screen style composition showing regular black coffee in one cup and creamy protein coffee in another cup side by side on a wooden table, emphasizing the color and texture difference

Not feeling the DIY route every single morning? I get it. Luckily, companies have caught onto this trend and created some solid ready-made options.

Pre-Made Protein Coffee Drinks

My favorite, Chike Nutrition Iced Coffee comes as a powder you mix with water or milk. It’s convenient for travel and way cheaper per serving than the ready-to-drink options. It’a also non-GMO which matters to me. Each serving packs 20 grams of protein and 100mg of caffeine.

Slate Milk High Protein Coffee is basically the gold standard here. It’s lactose-free, has 20 grams of protein, and actually tastes like real coffee. They come in classic flavors like mocha and vanilla, plus some fun seasonal ones.

Super Coffee delivers 15 grams of protein per bottle and uses MCT oil for that sustained energy. The flavors are solid, though some people find them a bit sweet. They’re everywhere now – gas stations, grocery stores, you name it.

Protein Powders That Work Best With Coffee

If you’re going the homemade route, not all protein powders play nice with coffee.

Isopure Coffee Protein Powder is literally designed for this purpose. It comes in espresso and other coffee-inspired flavors, so you’re not fighting against weird flavor combinations. Mix it with actual coffee or just use water for a lighter option.

Orgain Organic Protein & Superfoods blends smoothly and doesn’t have that chalky texture some cheaper brands leave behind. The vanilla flavor works surprisingly well with coffee’s bitterness.

Ghost Vegan Protein is perfect if you’re avoiding dairy. The peanut butter cereal milk flavor sounds weird with coffee, but trust me – it creates this amazing nutty flavor that’s borderline addictive. IMO, it’s one of the best vegan options out there.

All-In-One Protein Coffee Powders

These products combine coffee and protein in one powder – the ultimate convenience play.

Protein Coffee by Rapidfire gives you both in perfect proportion. Just add water, shake, and you’re done. Each serving has 15 grams of protein and about as much caffeine as a cup of coffee. Great for travel or those mornings when you can barely function.

Click All-In-One Protein & Coffee has a cult following for good reason. It’s espresso-based, packs 15 grams of protein, and includes added vitamins. The mocha and vanilla latte flavors taste legit.

Common Mistakes To Avoid

Let me save you from the protein coffee disasters I’ve witnessed (and committed).

  • Don’t add protein to boiling hot coffee. Seriously, don’t do it. The heat can denature the protein, creating those nasty clumps that ruin your whole experience. Let your coffee cool to around 140-150°F before mixing.
  • Using too much protein powder is a rookie move. Start with one scoop. You’re making coffee, not a full meal replacement. Too much protein makes it thick and gritty, plus your body can only process so much protein at once anyway.
  • Skipping the blender or frother and thinking you can just stir it works… if you enjoy chunky beverages. Spend the thirty seconds to blend it properly. Your taste buds will thank you.
  • Not considering your total daily protein intake is another common pitfall. That scoop in your coffee counts toward your daily total. Make sure you’re tracking it if you’re serious about your nutrition goals.

Who Should (And Shouldn’t) Drink Protein Coffee

Protein coffee isn’t for everyone, and that’s okay.
It’s perfect for you if:

  • You’re always rushing in the morning and skip breakfast
  • You work out early and need quick post-workout nutrition
  • You’re trying to increase your protein intake
  • You want sustained energy without the coffee crash
  • You’re looking to manage your appetite better

You might want to skip it if:

  • You’re sensitive to caffeine (obviously)
  • You have kidney issues (always check with your doctor about protein intake)
  • You prefer eating solid breakfasts
  • You’re pregnant or breastfeeding (consult your healthcare provider first)

Some people find that protein coffee upsets their stomach, especially on an empty stomach. If that’s you, try eating a small snack with it or switching to a different protein type.

Frequently Asked Questions

Does protein coffee taste good or is it just healthy?

Honestly? It can taste amazing when you do it right. The key is choosing a protein powder that complements coffee rather than fighting against it. Vanilla and chocolate varieties work best. When you blend it properly, it gets this frothy, almost latte-like texture that’s genuinely enjoyable. Sure, it won’t taste exactly like your fancy caramel macchiato, but it’s way better than you’d expect from something this nutritious.

Will protein coffee break my fast?

Yes, it will. Protein triggers an insulin response and kicks you out of a fasted state. If you’re doing intermittent fasting, save your protein coffee for when your eating window opens. However, if you’re just trying to lose weight or build muscle, the benefits of protein coffee might outweigh the benefits of fasting for you. It really depends on your specific goals.

How much protein should I put in my coffee?

Start with one scoop of your protein powder, which is usually around 20-25 grams of protein. That’s plenty for most people and won’t make your coffee too thick or overwhelming. You can adjust based on your daily protein needs and personal preference, but more isn’t always better. Your body can only absorb so much protein at once, and too much makes your coffee taste more like a protein shake than actual coffee.

Can I make protein coffee ahead of time?

You can, but fresh is always better. If you need to prep ahead, make a concentrated batch and store it in the fridge for up to two days. Give it a good shake or quick blend before drinking since ingredients might separate. Cold brew protein coffee holds up better than hot coffee that’s been cooled. Just know that the texture won’t be quite as smooth as when you make it fresh.

What’s the best time to drink protein coffee?

Most people crush their protein coffee first thing in the morning or right after a workout. Morning makes sense because you’re breaking an overnight fast and need both energy and nutrients. Post-workout is ideal because your muscles are primed to absorb protein for recovery. Some people even have it as an afternoon pick-me-up instead of a regular coffee. Just watch your caffeine intake if you’re drinking it later in the day.

Does the caffeine affect protein absorption?

Not really. There’s no solid evidence that caffeine significantly interferes with protein absorption. Some studies suggest caffeine might slightly reduce calcium absorption, but that’s different from protein. Your body will absorb the protein just fine. The bigger concern is whether you can handle the caffeine load, especially if you’re also drinking regular coffee throughout the day.

Final Thoughts

Protein coffee isn’t just another wellness trend that’ll disappear next month. It’s a practical solution for busy people who want nutrition, energy, and convenience without sacrificing taste. Whether you’re blending your own at home or grabbing a ready-made bottle online, you’re getting a legitimate nutritional upgrade to your morning routine.

Start simple with a basic recipe using your favorite protein powder and regular coffee. Experiment with different flavors, temperatures, and add-ins until you find your perfect combo. And remember, the best protein coffee is the one you’ll actually drink consistently.

Give it a shot for a week and see how you feel. Your muscles, energy levels, and probably your productivity will thank you. Now go blend something delicious.

High Protein Dinner Recipe: Grilled Shrimp and Cauliflower Mash (32g Protein)Protein

Looking for a dinner that’s light, satisfying, and packed with protein? This grilled shrimp and cauliflower mash recipe delivers a whopping 32 grams of protein while being incredibly easy on your stomach. It’s perfect for anyone following a GLP-1 medication plan or simply wanting a nutritious meal that won’t leave you feeling weighed down.

The combination of tender grilled shrimp, creamy cauliflower mash, and tangy roasted Brussels sprouts creates a restaurant-quality dish you can make at home in under 30 minutes. Best of all, it’s low in fat and high in fiber, making it ideal for maintaining steady energy throughout the evening.

What Makes This Recipe So Good

Close-up overhead shot of perfectly grilled pink shrimp with char marks arranged on a white ceramic plate, garnished with fresh herbs, professional food photography with natural lighting and shallow depth of field

This recipe checks all the boxes for a healthy, high-protein dinner. The shrimp provides lean protein that’s quick to digest and low in calories, while the cauliflower mash offers a creamy, comforting base without the heavy carbs of traditional mashed potatoes.


The Brussels sprouts add a delicious crunch and boost of fiber that helps you feel full longer. The balsamic glaze brings a touch of sweetness that perfectly balances the savory elements of the dish.


What really sets this meal apart is how gentle it is on your digestive system. There’s no heavy cream, excess fat, or ingredients that might trigger discomfort. It’s designed to keep you satisfied without that overly full feeling that can be uncomfortable when taking GLP-1 medications.


The meal is also incredibly versatile. You can prep components ahead of time, adjust seasonings to your preference, and even swap ingredients based on what you have on hand.

Ingredients

Creamy white cauliflower mash in a rustic ceramic bowl, smooth and fluffy texture visible, with a spoon creating a swirl pattern, soft neutral background, minimalist food styling

For the Grilled Shrimp:

  • 5 oz large shrimp, peeled and deveined
  • 1 tablespoon olive oil
  • 2 cloves garlic, minced
  • 1/2 teaspoon paprika
  • 1/4 teaspoon black pepper
  • 1/4 teaspoon salt
  • Fresh lemon juice from half a lemon

For the Cauliflower Mash:

  • 1 cup cauliflower florets (fresh or frozen)
  • 1/4 cup low-sodium chicken broth
  • 1 tablespoon light butter or olive oil
  • 1/4 teaspoon garlic powder
  • Salt and pepper to taste

For the Roasted Brussels Sprouts:

  • 1 cup Brussels sprouts, halved
  • 1 teaspoon olive oil
  • 2 tablespoons balsamic vinegar
  • 1 teaspoon honey or sugar-free sweetener
  • Salt and pepper to taste

Step-by-Step Instructions

Golden-brown roasted Brussels sprouts on a dark slate surface, glistening with balsamic glaze reduction, cut in half to show caramelized interior, moody restaurant-style lighting

Preparing the Brussels Sprouts:

  1. Preheat your oven to 400°F (200°C).
  2. Toss the halved Brussels sprouts with olive oil, salt, and pepper in a bowl.
  3. Spread them on a baking sheet cut-side down and roast for 20-25 minutes until crispy and caramelized.
  4. While they’re roasting, mix balsamic vinegar with honey in a small saucepan and simmer for 3-4 minutes until slightly thickened.
  5. Drizzle the balsamic glaze over the Brussels sprouts once they’re done.

Making the Cauliflower Mash:

  1. Steam the cauliflower florets until very tender, about 8-10 minutes.
  2. Transfer the steamed cauliflower to a blender or food processor.
  3. Add chicken broth, butter, garlic powder, salt, and pepper.
  4. Blend until smooth and creamy, adding more broth if needed to reach your desired consistency.
  5. Keep warm until ready to serve.

Grilling the Shrimp:

  1. Pat the shrimp dry with paper towels and place them in a bowl.
  2. Add olive oil, minced garlic, paprika, salt, and pepper, and toss to coat evenly.
  3. Heat a grill pan or skillet over medium-high heat.
  4. Cook the shrimp for 2-3 minutes per side until pink and opaque.
  5. Squeeze fresh lemon juice over the shrimp just before removing from heat.

Plating:

  1. Spread the cauliflower mash on your plate as a base.
  2. Arrange the grilled shrimp on top of the mash.
  3. Place the roasted Brussels sprouts alongside the shrimp.
  4. Garnish with fresh herbs or an extra squeeze of lemon if desired.

Storage Instructions

Complete plated dinner showing grilled shrimp alongside cauliflower mash and roasted Brussels sprouts on an elegant white plate, shot from 45-degree angle, garnished with microgreens, modern upscale dining presentation

Store each component separately in airtight containers in the refrigerator for up to 3 days. The shrimp stays freshest when stored alone and should be consumed within 2 days for best quality.


The cauliflower mash can be reheated in the microwave with a splash of chicken broth to restore its creamy texture. You can also reheat it on the stovetop over low heat, stirring frequently.


Brussels sprouts can be stored for up to 4 days and reheated in the oven at 350°F for 5-7 minutes to restore their crispiness. Avoid microwaving them as they’ll become soggy.


The balsamic glaze can be stored separately in a small jar for up to a week. Just give it a quick stir before using, as it may thicken when cold.

Why This Is Good for You

This meal delivers an impressive nutritional profile that supports your health goals. The 32 grams of protein from the shrimp helps maintain muscle mass and keeps you feeling satisfied for hours.


Cauliflower is incredibly nutrient-dense, providing vitamin C, vitamin K, and folate while being very low in calories. It’s also high in fiber, which aids digestion and helps regulate blood sugar levels.


Brussels sprouts are nutritional powerhouses packed with antioxidants, vitamins, and minerals. They’re particularly high in vitamin K and vitamin C, supporting bone health and immune function.


The low-fat nature of this meal makes it ideal for those on GLP-1 medications, as high-fat foods can sometimes exacerbate side effects like nausea. The fiber content helps with satiety and digestive health without causing discomfort.

Common Mistakes to Avoid

Don’t overcook the shrimp. They cook very quickly and become rubbery if left on heat too long. Remove them as soon as they turn pink and opaque.


Avoid adding too much liquid to the cauliflower mash at once. Start with less chicken broth and add more gradually until you reach the perfect creamy consistency.


Don’t skip patting the shrimp dry before seasoning. Excess moisture prevents proper browning and can make your shrimp steam rather than grill.


Make sure your Brussels sprouts are cut-side down on the baking sheet. This ensures they get that delicious caramelized crust that makes them so flavorful.


Don’t overcrowd the pan when cooking shrimp. Give them space so they sear properly rather than steam. Cook in batches if necessary.

Recipe Variations

  • Spicy Version: Add red pepper flakes or cayenne to the shrimp marinade and drizzle the finished dish with sriracha or hot sauce.
  • Herb-Crusted: Mix fresh herbs like parsley, dill, or cilantro into the cauliflower mash for added flavor and freshness.
  • Lemon-Garlic: Double the garlic and add lemon zest to both the shrimp and cauliflower mash for a bright, zesty flavor profile.
  • Asian-Inspired: Replace the balsamic glaze with a mixture of low-sodium soy sauce, rice vinegar, and a touch of sesame oil.
  • Bacon Brussels: Add a tablespoon of crumbled turkey bacon to the Brussels sprouts for a smoky flavor without too much added fat.

Frequently Asked Questions

Can I use frozen shrimp for this recipe?

Absolutely! Just make sure to thaw the shrimp completely and pat them very dry before cooking. Frozen shrimp works just as well as fresh and is often more affordable.

What if I don’t have a grill pan?

A regular skillet works perfectly fine. You can also broil the shrimp in the oven for 2-3 minutes per side or use an outdoor grill if you have one.

Can I make the cauliflower mash ahead of time?

Yes, you can make it up to 2 days in advance. Store it in the refrigerator and reheat gently with a bit of extra chicken broth to restore the creamy texture.

How do I know when the shrimp are done?

Shrimp are fully cooked when they turn pink and opaque throughout. They should form a loose “C” shape. If they curl into a tight “O,” they’re overcooked.

Can I substitute the chicken broth with something else?

You can use vegetable broth, unsweetened almond milk, or even water. Chicken broth just adds the most flavor, but the mash will still be creamy with other liquids.

Is this recipe suitable for meal prep?

It’s great for meal prep! Just store the components separately and assemble when ready to eat. The shrimp is best consumed within 2 days, but the vegetables last longer.

Final Thoughts

This grilled shrimp and cauliflower mash recipe proves that healthy eating doesn’t have to be boring or complicated. You get a satisfying, restaurant-quality meal that supports your nutritional goals without spending hours in the kitchen.


The combination of high protein, low fat, and plenty of fiber makes it ideal for anyone following a GLP-1 plan or simply wanting to eat better. It’s gentle on your stomach while keeping you full and energized.


Don’t be afraid to make this recipe your own by experimenting with different seasonings and variations. The basic formula of lean protein, veggie-based sides, and flavorful finishing touches works with countless combinations. Once you master this recipe, you’ll have a go-to dinner option that never gets old.

High-Protein Curry Chicken Salad (GLP-1 Friendly) – Quick, Flavorful, and 25g Protein Per Serving

If you want a fast, satisfying lunch that actually keeps you full, this curry chicken salad is it. It’s creamy, crunchy, a little sweet, and loaded with protein. You can whip it up in 10–15 minutes with simple ingredients and minimal chopping.

It’s also GLP-1 friendly, which means it’s higher in protein, modest in calories, and easy to portion out. Make a batch once, and you’re set for several easy meals.

What Makes This Recipe So Good

Close-up detail: A creamy, fully mixed curry chicken salad in a white ceramic bowl, showing finely s
  • 25 grams of protein per serving: The combo of chicken and Greek yogurt packs serious protein without weighing you down.
  • GLP-1 friendly: Higher protein, controlled fat, and fiber-rich add-ins help support steady energy.
  • Ready in 10–15 minutes: Use rotisserie chicken or pre-cooked chicken for instant prep.
  • Big flavor, simple ingredients: Curry powder, lemon, and a touch of honey or apple give warmth and brightness.
  • Meal-prep hero: Makes 3–4 servings, and it tastes even better the next day.

Shopping List

  • Cooked chicken breast (about 1.25–1.5 pounds, roughly 4 cups chopped or shredded)
  • Plain nonfat or 2% Greek yogurt (3/4 cup)
  • Light mayonnaise (2 tablespoons) for creaminess without too much fat
  • Curry powder (1.5–2 teaspoons, to taste)
  • Ground turmeric (1/4 teaspoon, optional for color and extra warmth)
  • Lemon juice (1–2 tablespoons) or lime juice
  • Dijon mustard (1 teaspoon)
  • Honey (1–2 teaspoons) or a small crisp apple (1/2 cup finely diced) for a light sweet note
  • Celery (2 ribs, finely diced)
  • Red onion (1/4 small, finely minced) or green onions
  • Fresh cilantro or parsley (2–3 tablespoons chopped)
  • Golden raisins or dried cranberries (2 tablespoons, optional)
  • Salt and black pepper
  • Optional add-ins: chopped almonds or cashews (2 tablespoons), cucumber, bell pepper, or a handful of baby spinach for serving

Step-by-Step Instructions

Cooking process: The dressing being whisked in a large glass mixing bowl—Greek yogurt, a small swi
  1. Prep the chicken: If using rotisserie chicken, remove skin and bones. Chop or shred about 4 cups of meat.Smaller pieces blend better with the dressing.
  2. Make the dressing: In a large bowl, whisk Greek yogurt, light mayo, curry powder, turmeric, lemon juice, Dijon, and honey. Start with 1.5 teaspoons curry and adjust. Season with 1/2 teaspoon salt and a few grinds of pepper.
  3. Add the crunch and color: Stir in celery, red onion, and cilantro. If using raisins, add them now so they soften slightly in the dressing.
  4. Fold in the chicken: Add the chicken and mix until evenly coated. If it’s too thick, splash in 1–2 teaspoons of water or more lemon juice.
  5. Taste and adjust: Add more salt, pepper, or curry to your liking. If you want extra brightness, a pinch of lemon zest is great.
  6. Serve your way: Spoon over mixed greens, tuck into a whole-grain wrap, or serve with cucumber rounds. For extra protein, pair with a hard-boiled egg on the side.

Storage Instructions

  • Refrigerate in an airtight container for 3–4 days. The flavors deepen by day two.
  • Keep greens separate: Store salad mix or wraps separately to prevent sogginess.
  • Stir before serving: The dressing may loosen a bit after chilling. Give it a quick stir and a squeeze of lemon if needed.
  • Do not freeze: The yogurt-based dressing can split when thawed.
Tasty top view: Overhead shot of the assembled curry chicken salad portioned into a meal-prep contai

Health Benefits

  • High protein for satiety: Each serving offers around 25 grams of protein to help keep you fuller, longer—especially helpful for those using GLP-1 medications where smaller portions go further.
  • Lighter dressing, same creaminess: Greek yogurt trims calories and adds extra protein compared to full mayo versions.
  • Balanced macros: Lean protein, modest healthy fats, and fiber from celery, onion, and optional apple or raisins create a steady, satisfying meal.
  • Anti-inflammatory spices: Curry powder and turmeric bring antioxidants that support overall wellness.
  • Customizable sodium and sugar: You control the salt and sweetener levels, making it easier to align with your goals.

What Not to Do

  • Don’t overload with mayo: Too much mayo adds unnecessary calories and can drown out the curry flavor.

    Stick to a light amount plus Greek yogurt.

  • Don’t skip the acid: Lemon or lime is key. Without it, the salad tastes flat.
  • Don’t use large chicken chunks: Big pieces don’t coat well and make the salad feel dry. Go for small, bite-size pieces.
  • Don’t overseason at the start: Curry blends vary.

    Start moderate, then adjust after mixing.

  • Don’t mix with hot chicken: Warm chicken can make the yogurt split. Cool the chicken before combining.

Alternatives

  • Dairy-free: Use plain dairy-free yogurt (coconut or almond) and a touch of olive-oil mayo. Add a squeeze more lemon to balance richness.
  • Higher protein boost: Stir in 2 tablespoons unflavored whey or collagen to the dressing, or add chopped hard-boiled egg whites.
  • No added sweetener: Skip honey and use diced apple or grapes for natural sweetness, or leave it out entirely for a more savory profile.
  • Nut-free crunch: Use sunflower seeds or pumpkin seeds instead of nuts.
  • Vegetable-forward: Fold in diced cucumber, bell pepper, or shredded carrots to add volume and fiber without many calories.
  • Spice swap: Try garam masala plus a pinch of cumin if you’re out of curry powder, or add cayenne for heat.
  • Protein swap: Turkey breast or canned chicken works in a pinch.

    For pescatarian, use canned tuna or poached salmon with the same dressing.

High-Protein Curry Chicken Salad (GLP-1 Friendly) – Quick, Flavorful, and 25g Protein Per Serving

Prep Time 10 minutes
Total Time 10 minutes
Servings: 4 servings

Ingredients
  

  • Cooked chicken breast (about 1.25–1.5 pounds, roughly 4 cups chopped or shredded)
  • Plain nonfat or 2% Greek yogurt (3/4 cup)
  • Light mayonnaise (2 tablespoons) for creaminess without too much fat
  • Curry powder (1.5–2 teaspoons, to taste)
  • Ground turmeric (1/4 teaspoon, optional for color and extra warmth)
  • Lemon juice (1–2 tablespoons) or lime juice
  • Dijon mustard (1 teaspoon)
  • Honey (1–2 teaspoons) or a small crisp apple (1/2 cup finely diced) for a light sweet note
  • Celery (2 ribs, finely diced)
  • Red onion (1/4 small, finely minced) or green onions
  • Fresh cilantro or parsley (2–3 tablespoons chopped)
  • Golden raisins or dried cranberries (2 tablespoons, optional)
  • Salt and black pepper
  • Optional add-ins: chopped almonds or cashews (2 tablespoons), cucumber, bell pepper, or a handful of baby spinach for serving

Method
 

  1. Prep the chicken: If using rotisserie chicken, remove skin and bones. Chop or shred about 4 cups of meat. Smaller pieces blend better with the dressing.
  2. Make the dressing: In a large bowl, whisk Greek yogurt, light mayo, curry powder, turmeric, lemon juice, Dijon, and honey. Start with 1.5 teaspoons curry and adjust. Season with 1/2 teaspoon salt and a few grinds of pepper.
  3. Add the crunch and color: Stir in celery, red onion, and cilantro. If using raisins, add them now so they soften slightly in the dressing.
  4. Fold in the chicken: Add the chicken and mix until evenly coated. If it’s too thick, splash in 1–2 teaspoons of water or more lemon juice.
  5. Taste and adjust: Add more salt, pepper, or curry to your liking. If you want extra brightness, a pinch of lemon zest is great.
  6. Serve your way: Spoon over mixed greens, tuck into a whole-grain wrap, or serve with cucumber rounds. For extra protein, pair with a hard-boiled egg on the side.

FAQ

How do I get to 25 grams of protein per serving?

Use about 4 cups of chopped cooked chicken breast for the full recipe and divide into four portions. The Greek yogurt adds a few grams as well. If you want to be precise, weigh the cooked chicken to around 600–650 grams for the batch.

Is this good for meal prep?

Yes. It keeps well for 3–4 days in the fridge. Store it in single-serve containers so you can grab and go.

Can I make it spicier?

Absolutely. Add cayenne, red pepper flakes, or a little diced jalapeño. Start small and taste as you go.

What should I serve it with?

It’s great over mixed greens, in lettuce cups, or in a whole-grain wrap. You can also serve it with cucumber slices, cherry tomatoes, or a side of quinoa for extra fiber.

Can I use regular mayo instead of light?

Yes, but keep portions modest if you want to keep it GLP-1 friendly. The Greek yogurt provides most of the creaminess, so you only need a little mayo for flavor and texture.

Is rotisserie chicken okay?

Yes. Just remove the skin to reduce saturated fat and sodium. Using mostly breast meat keeps protein high and calories reasonable.

How do I keep the onion flavor from overpowering?

Mince it very finely and use a small amount. You can also rinse the minced onion under cold water and pat dry to mellow the bite.

Can I make it without any sweet element?

Totally. Leave out the honey and dried fruit. Add a little extra lemon and a pinch more salt to balance the flavors.

Wrapping Up

This High-Protein Curry Chicken Salad checks all the boxes: fast, filling, and packed with flavor. With 25 grams of protein per serving, a creamy yogurt-based dressing, and fresh crunch, it’s a reliable meal-prep staple.

Keep it simple or dress it up with fruit, nuts, or extra veggies. Either way, you’ll have a satisfying, GLP-1 friendly option ready whenever hunger hits.

10 Glp-1 Friendly Fast Food Ideas That Won’T Fail You

Navigating fast food while on GLP-1 medications doesn’t have to feel like a minefield. You’re dealing with reduced appetite, potential nausea, and the need for protein-rich foods that won’t sit like a brick in your stomach.

These ten picks will keep you satisfied without triggering that awful “I ate too much” feeling that GLP-1 users know all too well.

Whether you’re traveling, stuck at work late, or just need something quick, these options respect both your medication and your taste buds.

1. Chipotle’s Protein Bowl Without The Carb Overload

Item 1

Chipotle practically designed their menu for GLP-1 users without even knowing it. You get complete control over every ingredient, which means you can build something that works perfectly with your reduced appetite and protein needs.

Skip the rice entirely and load up on fajita veggies as your base. They’re flavorful enough that you won’t miss the filler carbs. Add your choice of protein (chicken, steak, or carnitas work great), then pile on the good stuff: black beans for fiber, fresh tomato salsa, a little cheese, and maybe some guacamole if you’re feeling it.

Why This Works:

  • High protein content keeps you satisfied for hours
  • Customizable portions mean you control exactly how much you eat
  • Fajita veggies add volume without heaviness
  • Easy to reheat leftovers if you can’t finish it all

The beauty here is portion control. Most GLP-1 users find they can only eat about half, and that’s totally fine. Save the rest for later or share with someone. You’re getting 30-40 grams of protein without the food coma that comes from a burrito stuffed with rice and tortilla.

2. Chick-fil-A Grilled Nuggets With A Strategic Side

Item 2

Forget everything you thought you knew about chicken nuggets. Chick-fil-A’s grilled version is basically a GLP-1 user’s dream come true, seriously.

These little protein bombs come in perfectly portioned sizes that won’t overwhelm your reduced stomach capacity. Order the 8-count or 12-count depending on your appetite, and pair them with either the superfood side (kale and broccolini with dried cherries) or a fruit cup.

Each nugget is easy to eat slowly, which is crucial when you’re on these medications. You can stop whenever you feel that early satiety kick in. Plus, they’re legitimately tasty without being greasy or heavy. The grilled preparation means you’re getting clean protein without the fried coating that might trigger nausea.

Pro Tips:

  • Ask for extra Chick-fil-A sauce packets to keep things interesting
  • The superfood side adds fiber and nutrients without bulk
  • Order ahead on the app to skip the line when you’re hungry

You’re looking at about 25 grams of protein with minimal fat, and the whole meal sits comfortably without that overstuffed feeling.

3. Panera’s Power Bowls Done Right

Item 3

Panera jumped on the bowl trend, and honestly? They nailed it for people who need nutrient-dense, protein-forward meals.

The Baja Bowl or Mediterranean Bowl both deliver serious protein and flavor. Ask for extra protein (they’ll add more chicken for a couple bucks) and go easy on any grain components. The quinoa in these bowls is fine in moderation, but you want to prioritize the protein and vegetables.

What makes Panera particularly GLP-1 friendly is their willingness to customize. Don’t want the chips? Swap them for an apple. Need less dressing because rich foods trigger nausea? They’ll put it on the side. FYI, their portion sizes are generous, so plan to save half for later.

Key Benefits:

  • Fresh ingredients that don’t feel heavy
  • Good variety of vegetables for micronutrients
  • Easily customizable to your tolerance levels
  • Warm food that’s comforting without being greasy

These bowls pack around 20-30 grams of protein depending on your customizations, with enough fiber to support digestive health.

4. Starbucks Egg Bites For When You Need Something Gentle

Item 4

Sometimes you need something that won’t challenge your stomach at all. Enter Starbucks’ sous vide egg bites, which are basically engineered to be gentle on sensitive digestive systems.

The Egg White & Red Pepper bites are your lowest-fat option, while the Bacon & Gruyere version offers more flavor if you tolerate fat well. These things are soft, protein-rich, and come in a two-pack that’s often just the right amount for a GLP-1 appetite.

Each bite goes down easy, and the soft texture means less chewing and easier digestion. Pair them with a plain coffee or unsweetened tea, and you’ve got a solid meal that won’t trigger any of the uncomfortable side effects you’re trying to avoid. Trust me, these are clutch for days when nothing else sounds appealing.

You’re getting about 13-19 grams of protein per serving, which is perfect for a smaller meal or substantial snack.

5. Wendy’s Chili As Your Secret Weapon

Item 5

Who would’ve thought that fast food chili could be a health-conscious choice? Wendy’s chili is shockingly well-suited for GLP-1 users who need something warm, satisfying, and protein-packed.

A small chili gives you beef protein, beans for fiber, and vegetables all in one bowl. The consistency is gentle on your stomach, and the warmth can be soothing if you’re experiencing any nausea. Plus, it’s genuinely filling without requiring you to eat a huge volume of food.

Smart Ordering:

  • Start with a small size and see how you feel
  • Skip the crackers or save them for later
  • Add a side salad if you want more vegetables
  • Ask for shredded cheese on top for extra protein

The sodium is a bit high, so this isn’t an everyday choice, but when you need something comforting and substantial, Wendy’s chili delivers. You’re looking at around 23 grams of protein in a large, but most people will find the small size plenty satisfying.

6. Subway Protein Bowls With Maximum Control

Item 6

Subway finally figured out that not everyone wants a foot of bread, and their protein bowls are perfect for people who need to maximize protein while minimizing carbs and volume.

Order any of their sandwiches as a bowl instead. Load up on turkey, chicken, or roast beef, pile on all the vegetables you want, and go light on the dressing. You get all the flavor combinations you love without the bread that might fill you up before you get enough protein.

The brilliant part? You can see exactly what’s going into your bowl. No surprises, no hidden ingredients that might not sit well. You control the pace of assembly and can speak up if something looks like too much.

IMO, the rotisserie chicken protein bowl with spinach, tomatoes, cucumbers, peppers, and a drizzle of vinaigrette is perfection. You’re getting 30+ grams of protein with tons of vegetables and minimal heaviness.

7. McDonald’s Artisan Grilled Chicken Without The Bun

Item 7

Hear me out on this one. McDonald’s might not be your first thought for healthy eating, but their grilled chicken is actually legit when you ditch the bun.

Order the Artisan Grilled Chicken sandwich without the bun and with extra lettuce and tomato. What you end up with is a substantial piece of well-seasoned grilled chicken with toppings. Eat it with a fork, pair it with apple slices or a side salad, and you’ve got a surprisingly clean fast food meal.

Why This Works:

  • Real grilled chicken breast, not processed nuggets
  • Available literally everywhere
  • Inexpensive compared to other options
  • Quick when you’re in a time crunch

You’re getting around 28 grams of protein without the bun, and the chicken itself is moist enough that you don’t need heavy sauces. Add a packet of their mustard or just eat it plain.

8. Taco Bell Power Menu Bowl Customized

Item 8

Yes, Taco Bell can work on GLP-1 medications. You just need to know how to order strategically.

The Power Menu Bowl comes with seasoned rice, beans, chicken, cheese, guacamole, lettuce, tomatoes, and sour cream. Here’s your move: ask for light rice or no rice, double chicken, and go easy on the sour cream. What you’re left with is a protein-forward bowl with healthy fats from guacamole and fiber from beans.

Taco Bell’s app makes customization easy, so you can adjust everything before you even place your order. The seasoned chicken is surprisingly decent quality, and the mix of textures keeps things interesting when you’re eating slowly.

With modifications, you’re looking at 25-30 grams of protein with controlled portions of everything else. Plus, it’s one of the most affordable options on this list.

9. Jersey Mike’s Sub In A Tub Strategy

Item 9

Any sandwich shop that offers a “tub” or “bowl” option is your friend, and Jersey Mike’s does it particularly well with their generous portions and quality ingredients.

Order any of their subs “in a tub,” which means all the sandwich fillings served over lettuce instead of in bread. The Turkey & Provolone or Club Supreme work great. You get deli meat, cheese, vegetables, and their signature oil and vinegar dressing all in a bowl you eat with a fork.

Optimization Tips:

  • Ask for extra meat for more protein
  • Request dressing on the side to control how much you use
  • Add pickles, banana peppers, or jalapeños for flavor without calories
  • The regular size is usually enough for two meals

These tubs are seriously filling thanks to the protein and fat combo. You’re getting 30-40 grams of protein depending on your meat choices, with plenty of vegetables for nutrients.

10. KFC Grilled Chicken With Green Beans

KFC isn’t just about fried chicken anymore. Their grilled chicken is actually a solid choice when you need something quick and protein-rich.

Order a grilled chicken breast with green beans as your side. Skip the biscuit (or save it for someone else) and the mashed potatoes. What you get is straightforward, well-seasoned chicken that’s moist and flavorful without being greasy or heavy.

The green beans are a surprisingly decent vegetable option from a fast food joint. They’re seasoned well and add some fiber and nutrients to your meal without adding bulk that might make you uncomfortable.

One chicken breast delivers around 38 grams of protein with minimal fat, making it one of the most protein-dense options on this entire list. It’s not fancy, but sometimes simple is exactly what you need.

Final Thoughts:

The best part about these options? They’re all available at major chains you can find almost anywhere. You don’t need to meal prep perfectly or avoid social situations just because you’re on GLP-1 medications. These picks respect your medication, your appetite, and your need for protein-rich foods that won’t make you feel terrible afterward.

Now get out there and grab something that works for your body. You’ve got options, and none of them require you to feel deprived or uncomfortable. Your GLP-1 journey just got a whole lot easier.

Lemon Dill Baked Salmon – High Protein Dinner Idea (Glp-1 Friendly)

This is a calm, gentle dinner that still feels special. Lemon dill baked salmon is light, flaky, and full of clean flavors that won’t overwhelm your senses. The bright lemon, fresh dill, and tender asparagus roast together on one pan, making cleanup a breeze.

It’s rich in omega-3s and lean protein, yet mild enough for evenings when your appetite is low or your stomach is sensitive. Serve it with rice, potatoes, or just as is for a quiet, nourishing meal.

What Makes This Recipe So Good

Close-up detail: Flaky oven-baked salmon just out of the oven, fork gently lifting a moist, opaque f
  • Simple, fresh flavors: Lemon and dill enhance the salmon without masking its natural taste. It’s zesty but gentle.
  • One-pan convenience: Salmon and asparagus roast together, saving time and dishes.
  • Quick cooking: Dinner is on the table in about 25 minutes, with minimal prep.
  • Nausea-friendly: The flavors are mild, the texture is soft and flaky, and there’s no heavy cream or strong spices.
  • Nutritious: Salmon delivers omega-3 fatty acids and lean protein; asparagus adds fiber, vitamins, and color.

What You’ll Need

  • Salmon fillets: 4 pieces (about 5–6 ounces each), skin-on or skinless
  • Lemons: 2, one for zest and juice, one for slices
  • Fresh dill: About 1/4 cup, finely chopped, plus extra fronds for garnish
  • Asparagus: 1 pound, trimmed
  • Olive oil: 2–3 tablespoons
  • Garlic: 1 small clove, finely minced (optional for very sensitive stomachs)
  • Salt: Kosher or sea salt
  • Black pepper: Freshly cracked (or skip if pepper feels too sharp)
  • Butter: 1–2 tablespoons, cut into small pieces (optional, for richness)
  • Optional sides: Cooked rice, quinoa, or small roasted potatoes

Step-by-Step Instructions

Cooking process: One-pan salmon and asparagus mid-roast at 400°F, overhead shot capturing even spac
  1. Preheat the oven: Set it to 400°F (200°C).

    Line a large baking sheet with parchment for easy cleanup.

  2. Prep the asparagus: Trim the woody ends. Toss spears with 1 tablespoon olive oil, a pinch of salt, and a little pepper. Spread them on one side of the pan in a single layer.
  3. Season the salmon: Pat the fillets dry with paper towels.

    Place them skin-side down on the other side of the pan. Drizzle with 1–2 tablespoons olive oil. Sprinkle with salt and pepper.


    Add lemon zest over the top and a light squeeze of lemon juice.

  4. Add dill and garlic: Sprinkle chopped dill over the salmon. If using garlic, scatter a small amount on the fish and a touch on the asparagus. Keep it light if you’re nausea-prone.
  5. Top with lemon and butter: Lay a thin lemon slice or two over each fillet.

    Dot with small pieces of butter if you want a silkier finish.

  6. Roast: Bake for 10–14 minutes, depending on thickness. The salmon is done when it flakes easily with a fork and looks just opaque in the center. Asparagus should be crisp-tender with a bit of browning.
  7. Rest and finish: Let the salmon rest for 2 minutes on the pan.

    Taste the asparagus and add a squeeze of lemon if desired. Garnish with extra dill fronds.

  8. Serve: Plate the salmon with asparagus and any pan juices. Add your chosen side and a final sprinkle of salt to brighten everything.

How to Store

  • Refrigerate: Store leftovers in an airtight container for up to 2 days.

    Keep salmon and asparagus together or separate—both ways work.

  • Reheat gently: Warm in a 275°F (135°C) oven for 10–12 minutes or until just heated through. Avoid microwaving for too long, which can dry the fish.
  • Serve cold: Flaked cold salmon is great over greens or rice with a squeeze of lemon and a spoon of yogurt or light vinaigrette.
  • Freezing: Cooked salmon can be frozen up to 2 months, but texture is best fresh. Asparagus does not freeze well once roasted.
Tasty top view: Overhead plating of lemon dill baked salmon with roasted asparagus, served alongside

Benefits of This Recipe

  • Omega-3 support: Salmon provides EPA and DHA, which support heart and brain health.
  • Lean protein: Satisfying without heaviness, helping maintain energy and satiety.
  • Gentle flavors: Lemon and dill are bright yet soft on the palate, helpful on queasy days.
  • Balanced plate: Pairing salmon with asparagus gives you protein, fiber, vitamins A, C, and K, and minerals like selenium.
  • Low effort, high payoff: Minimal prep and cleanup make this a practical weeknight staple.

What Not to Do

  • Don’t overcook: Dry salmon is stringy and tough.

    Pull it when the center is just opaque and flakes easily.

  • Don’t drown it in lemon juice: Too much acid can turn the flavor harsh and start “cooking” the fish before it hits the oven.
  • Don’t skip drying the fish: Patting the fillets dry helps the surface roast, not steam.
  • Don’t overload the pan: Crowding traps moisture. Give the asparagus and salmon space for good browning.
  • Don’t go heavy on garlic or pepper if sensitive: Keep seasoning light if your stomach is unsettled.

Alternatives

  • Different herbs: Swap dill for parsley, chives, or tarragon. These keep the flavor soft and fresh.
  • Vegetable swap: Use green beans, broccolini, or zucchini.

    Cut to similar thickness so everything cooks evenly.

  • Citrus twist: Try Meyer lemon or a mix of lemon and orange for gentle sweetness.
  • Dairy-free: Skip the butter and use a drizzle of extra olive oil for richness.
  • Foil pack method: Wrap salmon, dill, and lemon in a foil packet and bake 12–15 minutes for extra-moist results.
  • Skin-on vs. skinless: Skin-on helps keep moisture. If skinless, watch the cook time closely.
  • If you can’t do asparagus: Roast baby carrots or peeled, thinly sliced parsnips alongside. They’re sweet and gentle.

FAQ

How do I know when salmon is done?

The flesh should turn from translucent to opaque and flake easily with a fork.

A thermometer inserted into the thickest part should read about 125–130°F for medium, or up to 135°F if you prefer it more done. Pull it a touch earlier if it will rest on the hot pan.

Can I use frozen salmon?

Yes. Thaw it in the refrigerator overnight or under cold running water in its packaging.

Pat it very dry before seasoning to prevent steaming and to help the dill and lemon adhere.

What if I don’t like dill?

Use parsley, chives, or a mix of both. They add a fresh note without dominating. Tarragon also works, but use lightly as it’s more aromatic.

Is this safe for nausea-prone days?

Generally yes, thanks to the mild flavors and tender texture.

Keep garlic and pepper minimal, and use just a little lemon. Serve with plain rice or toast for a gentler meal.

Can I cook everything in a skillet instead?

You can. Sear the salmon lightly in an oven-safe skillet, add asparagus around it, top with lemon and dill, and finish in a 400°F oven until flaky.

This gives a touch more browning on the fish.

What sides go best?

Simple ones. Steamed rice, quinoa, roasted baby potatoes, or a soft mashed potato keep the dish easy and comforting. A spoon of plain yogurt with lemon on the side is nice too.

How do I prevent a strong “fishy” smell?

Use fresh salmon, cook it soon after buying, and avoid overcooking.

A quick rinse, thorough pat dry, and a bit of lemon zest on top help keep the aroma clean.

Wrapping Up

Lemon dill baked salmon is a calm, reliable dinner you can make any night. It’s bright but not intense, nourishing without heaviness, and quick to pull together on one pan. With a few fresh ingredients and a gentle touch, you’ll get tender salmon, crisp-tender asparagus, and a meal that feels good to eat—especially when you want something soothing and simple.

Keep this one in your weeknight rotation and adjust the seasonings to match how you feel that day.

Final dish presentation: Restaurant-quality angled shot of a single salmon fillet on a matte white p

Greek Chicken Protein Bowl – High Protein, GLP-1 Friendly Lunch

This bowl is built for days when you need steady energy and serious protein without a heavy meal. It’s simple: juicy grilled chicken thighs over crisp greens, crunchy cucumber, and sweet cherry tomatoes, finished with a cool Greek yogurt tzatziki. The flavors are bright and clean, and the textures are satisfying without feeling heavy.

It’s high in protein, low in fuss, and easy to prep ahead. If your appetite is low or you’re eating in a GLP-1-guided way, this bowl delivers a lot of nutrition in a small, manageable portion.

Why This Recipe Works

Cooking process: Juicy grilled chicken thighs sizzling on a grill pan, lightly charred crosshatch ma
  • High protein density: Chicken thighs and Greek yogurt pack in protein without a large volume of food.
  • Balanced flavors and textures: Creamy tzatziki, crisp veggies, and tender chicken keep each bite interesting.
  • GLP-1 friendly: Protein-forward, fiber-rich, and light on refined carbs to support fullness and stable energy.
  • Fast and flexible: Grill, pan-sear, or air-fry the chicken; prep components ahead for easy assembly.
  • Everyday ingredients: Nothing fancy—just fresh produce, pantry spices, and Greek yogurt.

Ingredients

  • For the Chicken
    • 1.5 pounds boneless, skinless chicken thighs
    • 2 tablespoons extra-virgin olive oil
    • 2 teaspoons dried oregano
    • 1 teaspoon garlic powder
    • 1 teaspoon onion powder
    • 1/2 teaspoon smoked paprika (optional for warmth)
    • Zest of 1 lemon, plus 2 tablespoons lemon juice
    • 1 teaspoon kosher salt
    • 1/2 teaspoon black pepper
  • For the Tzatziki
    • 1 cup plain 2% or nonfat Greek yogurt
    • 1/2 medium English cucumber, grated and well-squeezed
    • 1 clove garlic, finely grated
    • 1 tablespoon fresh dill, chopped (or 1 teaspoon dried)
    • 1 tablespoon lemon juice
    • 1 tablespoon extra-virgin olive oil (optional for richness)
    • 1/4 teaspoon kosher salt, to taste
    • Black pepper, to taste
  • For the Bowl
    • 6 cups mixed greens (romaine, baby spinach, or arugula)
    • 1 cup cherry tomatoes, halved
    • 1 small cucumber, sliced or chopped
    • 1/4 small red onion, thinly sliced (optional)
    • 1/4 cup pitted Kalamata olives, halved (optional)
    • 1/4 cup feta cheese, crumbled (optional)
    • Lemon wedges for serving

Instructions

Close-up detail: Sliced grilled chicken thigh fanned over crisp romaine and baby spinach, focus on t
  1. Marinate the chicken: In a bowl, mix olive oil, oregano, garlic powder, onion powder, smoked paprika, lemon zest, lemon juice, salt, and pepper. Add chicken thighs and toss to coat.

    Let sit 15–30 minutes at room temperature (or up to 8 hours in the fridge).

  2. Make the tzatziki: Grate the cucumber, then squeeze out excess water with a clean towel. Stir into Greek yogurt with garlic, dill, lemon juice, olive oil, salt, and pepper. Adjust to taste and chill.
  3. Cook the chicken (grill): Heat the grill to medium-high and oil the grates.

    Grill chicken 5–6 minutes per side, until lightly charred and the internal temperature reaches 165°F (74°C). Rest 5 minutes, then slice.

  4. Or cook on the stove: Heat a large skillet or grill pan over medium-high with a thin layer of oil. Sear thighs 5–6 minutes per side until cooked through.

    Rest, then slice.

  5. Prep the veggies: While the chicken cooks, toss greens into bowls. Add cherry tomatoes, cucumber, and red onion. Add olives and feta if using.
  6. Assemble: Top greens with sliced chicken.

    Spoon on a generous dollop of tzatziki. Add a squeeze of lemon and a light drizzle of olive oil if you like.

  7. Serve: Enjoy right away while the chicken is warm and the veggies are crisp.

Storage Instructions

  • Chicken: Store cooked chicken in an airtight container in the fridge for up to 4 days. Reheat gently in a skillet or microwave, or serve chilled.
  • Tzatziki: Keeps for 3–4 days in the fridge.

    Stir before using.

  • Veggies and greens: Store separately with a paper towel to absorb moisture. Use within 3 days for best crunch.
  • Meal prep tip: Portion chicken and tzatziki in small containers. Pack greens and veggies separately to avoid sogginess, then assemble just before eating.
Tasty top view: Overhead shot of the assembled Greek Chicken Protein Bowl—mixed greens base topped

Health Benefits

  • High-quality protein: Chicken thighs and Greek yogurt deliver complete protein to support muscle, satiety, and recovery.
  • GLP-1 friendly composition: Protein-forward with fiber from greens and cucumber supports fullness with fewer calories and minimal refined carbs.
  • Heart-healthy fats: Extra-virgin olive oil and olives (if included) provide monounsaturated fats that support cardiovascular health.
  • Micronutrient rich: Tomatoes bring vitamin C and antioxidants; leafy greens offer folate, vitamin K, and minerals; yogurt adds calcium and probiotics.
  • Blood sugar support: The balance of protein, fat, and fiber helps blunt glucose spikes and sustain energy.

Pitfalls to Watch Out For

  • Watery tzatziki: If you skip squeezing the cucumber dry, the sauce can thin out.

    Press it well.

  • Bland chicken: Don’t rush the seasoning or the sear. Salt generously and cook hot enough to get color.
  • Soggy greens: Assemble just before eating. Keep toppings and dressing separate if packing to go.

  • Portion creep: For GLP-1 goals, keep add-ons like feta and olives modest.

    They’re delicious but calorie-dense.


  • Overcooked chicken: Use a thermometer. Pull at 165°F (74°C) and rest to keep it juicy.

Recipe Variations

  • Extra-lean option: Swap thighs for chicken breast. Marinate longer and avoid overcooking to keep it tender.
  • Herb-forward: Add fresh oregano, parsley, and mint to the marinade and tzatziki for brighter flavor.
  • Low-lactose tweak: Use lactose-free Greek yogurt.

    Many brands offer great texture and tang.

  • Add grains (if desired): A small scoop of cooked quinoa or farro under the greens adds fiber and texture without overpowering the bowl.
  • Spice it up: Add red pepper flakes to the marinade or a sprinkle of Aleppo pepper over the finished bowl.
  • Vegetarian swap: Use grilled halloumi or marinated tofu. Keep the same seasonings and pair with the tzatziki.
  • Meal-prep jars: Layer dressing/tzatziki at the bottom of a jar, then chicken, then sturdy veggies, and greens on top. Shake and eat.

FAQ

Can I use store-bought tzatziki?

Yes.

Choose a Greek yogurt-based version with simple ingredients. Taste and adjust with extra lemon, dill, or pepper if needed.

Do I have to grill the chicken?

No. Pan-searing, baking at 425°F (220°C) for 18–22 minutes, or air-frying at 380°F (193°C) for 14–16 minutes all work well.

Always check for 165°F (74°C) internal temperature.

What if I don’t like dill?

Use parsley, mint, or a mix. The fresh herbs keep the sauce lively without the dill flavor.

Is this bowl good for meal prep?

Absolutely. Cook the chicken and make the tzatziki ahead.

Keep components separate and assemble right before eating for the best texture.

Can I make it dairy-free?

Yes. Use a thick dairy-free yogurt (coconut or almond-based) for the tzatziki, and skip feta. Check labels for protein content if you’re aiming for a higher-protein bowl.

How can I boost protein even more?

Add extra chicken, a spoon of cottage cheese under the tzatziki, or a sprinkle of hemp hearts over the greens.

Keep portions aligned with your appetite.

What greens work best?

Romaine and baby spinach hold up well and add crunch. Arugula adds peppery bite. Use what you like or mix them for variety.

Can I make it ahead and eat it cold?

Yes.

This bowl tastes great chilled. Slice the chicken after cooling, then assemble with fresh veggies and tzatziki right before eating.

Wrapping Up

This Greek Chicken Protein Bowl keeps things simple: well-seasoned chicken, crisp veggies, and a bright, creamy tzatziki. It’s high in protein, easy to prep, and satisfying without being heavy.

Whether you’re focused on GLP-1-friendly meals, managing a light appetite, or just want something fresh and tasty, this bowl fits the bill. Keep the ingredients on hand, and you’ll have a go-to meal you can build in minutes.

Final dish presentation: Restaurant-quality plating of the Greek Chicken Protein Bowl on a wide whit

High-Protein Cottage Cheese Breakfast Bowl – GLP-1 Friendly

This breakfast bowl is simple, satisfying, and kind to a sensitive stomach. It leans on full-fat cottage cheese for creamy texture and steady energy, then adds fresh berries, a touch of honey, and nutty hemp seeds for balance. It’s an easy way to get around 28 grams of protein without cooking.

If you’re taking a GLP-1 medication or just prefer slower-digesting meals, the casein-rich cottage cheese helps keep you full for hours. Best of all, it’s fast to make and easy to customize.

What Makes This Special

Close-up detail: A creamy swirl of full-fat cottage cheese in a matte white bowl, topped with a glis

This bowl is built for comfort, protein, and ease. Full-fat cottage cheese provides casein protein, which digests slowly and supports steady blood sugar and satiety.

Berries add fiber and antioxidants with gentle sweetness. A light drizzle of honey gives balance without overpowering the dish. Hemp seeds contribute complete plant protein, healthy fats, and a pleasant crunch.

The combo is GLP-1 friendly because it emphasizes protein, fiber, and fat—nutrients that help you feel full and steady.

Ingredients

  • 1 cup full-fat cottage cheese (4% milkfat preferred)
  • 1/2 cup mixed berries (blueberries, raspberries, or strawberries; fresh or thawed frozen)
  • 1–2 teaspoons honey (adjust to taste)
  • 1 tablespoon hemp seeds (shelled/hemp hearts)
  • Optional add-ons: pinch of cinnamon, splash of vanilla extract, lemon zest, a few crushed walnuts or sliced almonds, or a spoonful of chia seeds
  • Optional swaps for sweetness: mashed ripe banana, a few drops of pure maple syrup, or a non-nutritive sweetener you tolerate

How to Make It

Tasty top view: Overhead shot of the assembled High-Protein Cottage Cheese Breakfast Bowl—neatly l
  1. Spoon the cottage cheese into a bowl and give it a quick stir to make it smooth and creamy.
  2. Top with berries. If using frozen berries, let them sit for a few minutes to soften and release their juices.
  3. Drizzle with honey. Start with 1 teaspoon and taste before adding more.
  4. Sprinkle hemp seeds evenly over the top for texture and extra protein.
  5. Add any optional extras, like a pinch of cinnamon or lemon zest, to brighten the flavor.
  6. Stir lightly if you like it swirled, or keep the layers separate and spoon through each bite.

Keeping It Fresh

For the best texture, assemble right before eating.

If you want to prep ahead, portion the cottage cheese into individual containers and refrigerate for up to 4 days. Keep berries and toppings separate, then add them just before serving to avoid watery bowls. If you’re using frozen berries, thaw them overnight in the fridge and drain excess liquid for a thicker bowl.

Store hemp seeds in a cool, dark place to keep their delicate fats fresh.

Cooking process: The “before the stir” moment—cottage cheese spooned into a bowl being gently

Benefits of This Recipe

  • High protein, slow digestion: Cottage cheese is rich in casein, which digests slowly and helps you stay satisfied longer. One cup of full-fat cottage cheese plus hemp seeds typically delivers around ~28g of protein.
  • GLP-1 friendly: The balance of protein, healthy fats, and fiber supports appetite control and steady energy—helpful if you’re on GLP-1 medications and prefer smaller, nutrient-dense meals.
  • Gentle on the stomach: The creamy base and simple toppings are easy to tolerate for many people, especially in the morning.
  • Blood sugar friendly: Berries offer fiber and antioxidants with lower natural sugar compared to many fruits. Honey is used sparingly for taste.
  • Quick and flexible: No cooking needed.

    You can adjust sweetness, texture, and toppings to match your needs.

Pitfalls to Watch Out For

  • Too much sweetener: More honey or syrup can spike sugar and overshadow the fresh flavors. Start small.
  • Watery texture: Adding juicy or thawed berries directly can thin the cottage cheese. Drain or pat berries dry if that bothers you.
  • Low-fat cottage cheese swap: It’s fine, but it may feel less satisfying and creamy.

    Full-fat supports steadier energy and better mouthfeel.

  • Sensitivity to dairy: If you’re lactose sensitive, look for lactose-free cottage cheese. Some brands are gentler on digestion.
  • Overloading toppings: Nuts, seeds, and granola add nutrition but can quickly push calories higher. Measure if you’re tracking intake.

Alternatives

  • Dairy-free version: Use a thick, unsweetened coconut or almond-based yogurt alternative and stir in a scoop of unflavored plant protein.

    Note it won’t have casein, so digestion may be quicker.

  • Different protein boost: Mix in 1–2 tablespoons of powdered collagen or a small scoop of unflavored whey isolate if you want extra protein without changing flavor much.
  • Fruit swaps: Try sliced kiwi, peaches, or pomegranate arils. For the most GLP-1-friendly approach, stick with berries for higher fiber and lower sugar.
  • Crunch changes: Swap hemp seeds for pumpkin seeds, chia, or crushed walnuts. Chia thickens the bowl slightly and adds more fiber.
  • Savory route: Skip honey and berries.

    Add cherry tomatoes, cucumber, olive oil, lemon, cracked pepper, and herbs. Still high in protein, just a different flavor profile.

FAQ

How Much Protein Is Actually in This Bowl?

It varies by brand, but 1 cup of full-fat cottage cheese typically offers 24–28g of protein. One tablespoon of hemp seeds adds about 3g.

With berries and honey included, you’re usually around ~28g total.

Is Full-Fat Cottage Cheese Better Than Low-Fat Here?

For satiety and texture, yes. The fat helps slow digestion and makes the bowl taste richer. If you prefer low-fat, that’s fine—just know it may be less filling, and you might want to add healthy fats like hemp seeds or a few chopped nuts.

Is This Bowl Good for a Sensitive Stomach?

Often, yes.

The creamy base and simple toppings are usually gentle. If dairy is an issue, choose a lactose-free cottage cheese or a well-tolerated yogurt alternative. Keep the honey light and avoid too many crunchy add-ins at first.

Can I Make This the Night Before?

You can prep components ahead, but assemble right before eating to avoid a watery bowl.

Portion cottage cheese in a container and store berries and hemp seeds separately. Add honey and toppings in the morning.

What If I’m Avoiding Added Sugar?

Skip the honey and use extra berries, a dash of cinnamon, or a few drops of vanilla. If you like, use a non-nutritive sweetener you tolerate.

The bowl is still flavorful thanks to the berries and creamy cottage cheese.

Will This Keep Me Full Until Lunch?

Many people find it does. The mix of casein protein, healthy fats, and fiber supports lasting satiety. If you need more staying power, add a tablespoon of chia seeds or a small handful of nuts.

Can I Blend It?

Yes, but blending will make it smoother and more like a pudding.

If you do, keep berries light and add hemp seeds after blending for some texture.

Is It Suitable Before a Workout?

It can be, especially 60–90 minutes before. If you want quicker energy, add a bit more honey or a half banana. For post-workout, it also works well thanks to its high protein content.

Final Thoughts

This cottage cheese breakfast bowl is straightforward, filling, and adaptable.

You get slow-digesting protein, gentle sweetness, and satisfying texture without much effort. It fits busy mornings, supports steady energy, and can be tailored to your taste or tolerance. Keep the base simple, adjust the toppings, and enjoy a bowl that works as hard as you do—no cooking required.

Final plated dish: Restaurant-quality presentation of the breakfast bowl garnished for maximum appea

High Protein, High Fiber Slow Cooker Mexican Shredded Chicken Recipe for GLP-1 Weight Loss

This slow cooker Mexican shredded chicken is the kind of recipe you’ll make once and keep on repeat. It’s bold, juicy, and perfect for tacos, bowls, salads, or lettuce wraps. Even better, it’s high in protein and fiber to support satiety—great for anyone using GLP-1 medications or focusing on steady, satisfying weight loss.

Toss everything in the slow cooker, walk away, and come back to tender, pull-apart chicken. Simple ingredients, big flavor, and lots of ways to serve it all week long.

What Makes This Special

slow cooker shredded mexican chicken just pulled from the slow cooker, glistening
  • High protein, high fiber: Chicken breast plus fiber-rich beans and veggies help keep you full and energized.
  • GLP-1 friendly: Balanced, lower in fat, and gentle on the stomach, with steady flavors that don’t rely on heavy creams or oils.
  • Meal-prep hero: Makes a generous batch that reheats beautifully for quick lunches and dinners.
  • Hands-off cooking: The slow cooker does the work, and cleanup is minimal.
  • Versatile: Build bowls, tacos, stuffed peppers, or burrito-style salads with the same base.

Shopping List

  • 2 to 2.5 pounds boneless, skinless chicken breasts (or thighs if you prefer, but breasts keep it lean)
  • 1 (14–15 oz) can black beans, drained and rinsed
  • 1 (14–15 oz) can fire-roasted diced tomatoes (no salt added if preferred)
  • 1 cup salsa (mild or medium, no-sugar-added)
  • 1 medium yellow onion, finely chopped
  • 1 red bell pepper, diced
  • 1 cup frozen corn (optional for extra fiber and color)
  • 2 tablespoons tomato paste (for depth and body)
  • 2–3 tablespoons taco seasoning (low-sodium, or homemade)
  • 1 teaspoon ground cumin
  • 1 teaspoon smoked paprika
  • 1/2 teaspoon chili powder (adjust to heat preference)
  • 1/2 teaspoon garlic powder
  • 1/2 teaspoon onion powder
  • 1/2 teaspoon kosher salt (more to taste)
  • 1/4 teaspoon black pepper
  • 1/2 cup low-sodium chicken broth (or water)
  • Juice of 1 lime
  • Fresh cilantro, chopped (for serving)
  • Optional toppings: shredded cabbage, avocado slices, Greek yogurt, pickled onions, jalapeños
  • Optional high-fiber bases: cauliflower rice, quinoa, high-fiber tortillas, or shredded lettuce

Instructions

Cooking process: Overhead shot of the slow cooker after shredding and stirring the chicken back into
  1. Prep the base: Add diced tomatoes, salsa, onion, bell pepper, corn, black beans, tomato paste, and chicken broth to the slow cooker. Stir to combine.
  2. Season generously: In a small bowl, mix taco seasoning, cumin, smoked paprika, chili powder, garlic powder, onion powder, salt, and pepper.

    Sprinkle evenly over the chicken breasts.

  3. Load the cooker: Nestle the seasoned chicken into the sauce and veg mixture. Spoon some sauce over the top so everything’s coated.
  4. Cook low and slow: Cover and cook on Low for 5–6 hours or on High for 2.5–3.5 hours, until the chicken is very tender and easily shreds.
  5. Shred and brighten: Remove chicken to a cutting board and shred with two forks. Return the chicken to the cooker, add lime juice, and stir.

    Taste and adjust salt, lime, or spices.

  6. Thicken if needed: If the mixture is too saucy for your liking, let it cook uncovered on High for 15–20 minutes, stirring occasionally.
  7. Serve your way: Build bowls with cauliflower rice or quinoa, fill lettuce wraps or high-fiber tortillas, or spoon over a cabbage slaw. Top with cilantro and your favorite add-ons.

Keeping It Fresh

  • Refrigerate: Store in airtight containers for up to 4 days. It tastes even better the next day.
  • Freeze: Portion into freezer-safe bags or containers for up to 3 months.

    Press flat for quick thawing.

  • Reheat: Warm gently on the stove over medium-low with a splash of broth, or microwave in 60–90 second bursts, stirring between intervals.
  • Meal prep tip: Pack with a fiber base (cauliflower rice or quinoa) and add fresh toppings just before eating to keep textures crisp.
Tasty top view: Meal-prep bowls arranged in a grid, each with a base of fluffy cauliflower rice or q

Benefits of This Recipe

  • Supports fullness: Lean protein and fiber help manage hunger and make portions satisfying without being heavy.
  • Steady energy: Balanced macros help minimize blood sugar spikes, which can support weight-loss goals.
  • Simple to digest: Gentle spices and a broth-tomato base are easier on the stomach, which can be helpful for people on GLP-1s who experience nausea.
  • Flexible portions: Easy to scale up or down, and to tailor carbs by choosing your base (greens, cauliflower rice, or whole grains).
  • Nutrient-dense: Packed with vitamins from peppers, tomatoes, and beans, plus potassium and iron.

Common Mistakes to Avoid

  • Overcooking on High: Chicken can dry out quickly. If you can, choose Low for the most tender result.
  • Skipping the rinse on beans: Rinsing reduces excess sodium and keeps flavors clean.
  • Not seasoning enough: Slow cooker recipes need a bold seasoning blend. Taste at the end and adjust salt/lime.
  • Too much liquid: The tomatoes, salsa, and onion release moisture.

    Start with 1/2 cup broth and thicken at the end if needed.

  • Adding dairy too early: If using Greek yogurt as a topping, add at serving so it doesn’t curdle.

Recipe Variations

  • Chipotle-lime: Add 1–2 minced chipotle peppers in adobo and an extra tablespoon of lime juice for smoky heat.
  • Green salsa (salsa verde): Swap red salsa for salsa verde and add 1/2 teaspoon coriander for a bright, tangy version.
  • Extra fiber boost: Stir in 1/2 cup cooked lentils during the last 30 minutes. They meld right in and increase satiety.
  • Low-carb focus: Skip corn and serve with cauliflower rice, shredded lettuce, or cabbage slaw.
  • Thigh option: Use boneless, skinless chicken thighs for richer flavor and extra tenderness if you’re not strictly lean-protein focused.
  • Spice it up: Add fresh jalapeño or a pinch of cayenne if you like more heat.

FAQ

Is this recipe good for people on GLP-1 medications?

Yes. It’s high in protein and fiber, lower in fat, and uses gentle, tomato-based sauce with mild spices.

Portions are flexible, and you can choose a base that feels best for your stomach.

How can I make it even higher in fiber?

Mix in extra black beans or pinto beans, or serve over cauliflower rice plus a scoop of quinoa. Topping with shredded cabbage or a bean-and-corn salsa also helps.

Can I use frozen chicken?

For safety and best texture, thaw chicken in the fridge before adding to the slow cooker. Frozen meat can keep the cooker in the “danger zone” temperature too long.

What’s the best way to keep it from getting watery?

Use only 1/2 cup broth, drain and rinse beans, and thicken at the end by cooking uncovered for 15–20 minutes.

Tomato paste also adds body without extra fat.

Can I make this in an Instant Pot?

Yes. Combine everything, pressure cook on High for 10–12 minutes (breasts) or 12–14 minutes (thighs), natural release 10 minutes, then quick release. Shred, stir in lime, and adjust seasoning.

How do I serve this for a lower-calorie meal?

Use lettuce wraps or a bowl with shredded lettuce, pico de gallo, and a spoon of Greek yogurt.

Skip cheese and keep avocado modest if you’re watching calories.

What about sodium?

Choose low-sodium broth, no-salt-added tomatoes, and a low-sodium taco seasoning. Taste before adding extra salt—lime and cilantro brighten flavor without more sodium.

Can I make it dairy-free?

The base is naturally dairy-free. Just use dairy-free toppings like avocado, salsa, and fresh herbs instead of yogurt or cheese.

Wrapping Up

This slow cooker Mexican shredded chicken is simple to make, packed with protein and fiber, and easy to fit into a GLP-1 friendly routine.

It’s flavorful without being heavy, and it works for tacos, bowls, salads, or quick meal-prep boxes. Keep a batch in the fridge or freezer, and you’ll have a satisfying, ready-to-go option whenever hunger hits. Add fresh lime and cilantro, and you’ve got a bright, wholesome meal any night of the week.

Final dish presentation: Two street-style tacos on a neutral ceramic plate, filled with the saucy sh

Glp-1 Weight Loss Explained: the Science, the Results, and What You Should Know

You’ve probably heard the buzz. Maybe your neighbor lost 30 pounds seemingly overnight, or your coworker casually mentioned they’re on “that new medication” and suddenly food just doesn’t hit the same way anymore. The weight loss world is having a moment with GLP-1 medications, and honestly? It’s not just hype this time.

If you’ve spent years trying every diet, counting every calorie, and feeling like your body just won’t cooperate no matter what you do, this conversation might feel different. GLP-1 medications aren’t another fad promising miracle results through willpower alone—they’re actually working with your biology instead of against it. And that changes everything.

We’re going to break down what GLP-1 really is, how it works in your body, what the actual science says (spoiler: it’s pretty impressive), and what you absolutely need to know before considering this option.

Whether you’re just curious or seriously exploring your weight loss options, let’s dive into the real story behind the headlines.

What Exactly Is GLP-1 and Why Should You Care?

GLP-1 stands for glucagon-like peptide-1, which sounds super scientific and intimidating, but here’s the thing: your body already makes this stuff naturally. It’s a hormone your gut releases when you eat, and its main job is telling your brain “Hey, we’re full now, you can stop eating.”

The problem? Some of us don’t produce enough of it, or our bodies don’t respond to it the way they should.

And that’s where these medications come in. Drugs like Ozempic, Wegovy, Mounjaro, and Zepbound are basically synthetic versions of this hormone that stick around way longer than the natural stuff your body makes.

Think of it like turning up the volume on a signal your brain was struggling to hear. When that signal gets loud and clear, something pretty remarkable happens: you genuinely feel less hungry. Not in a “white-knuckle through your cravings” way, but in a “huh, I’m actually satisfied with less food” way.

The Science Behind How GLP-1 Actually Works

Close-up macro photograph of a single injection pen lying on a clean white laboratory surface with soft, clinical lighting and shallow depth of field

Let’s get nerdy for a second (but not too nerdy, I promise). GLP-1 medications work through several mechanisms that all team up to help you lose weight.

The Appetite Suppression Effect

This is the big one. GLP-1 receptors in your brain literally reduce your appetite. You’re not forcing yourself to eat less through sheer willpower—you genuinely want less food. People on these medications consistently report that food noise (those constant thoughts about what to eat next) just… quiets down.
It’s like someone turned down the volume on cravings you didn’t even realize were constantly playing in the background.

Slower Gastric Emptying

Here’s another cool trick: GLP-1 slows down how quickly food leaves your stomach. This means you feel fuller longer after eating. That mid-afternoon snack attack? Way less likely to happen when your lunch is still keeping you satisfied hours later.

Blood Sugar Regulation

GLP-1 also helps regulate your blood sugar by stimulating insulin release when your blood sugar is high and reducing glucagon (which raises blood sugar). This was actually the original purpose of these drugs—they were developed for type 2 diabetes. The weight loss was technically a side effect, though now it’s become the main event for many people.

The Results: What the Research Actually Shows

Okay, so how well does this stuff actually work? Because we’ve all been burned by weight loss promises before, right?

The clinical trial results are honestly pretty impressive. In studies of semaglutide (the active ingredient in Wegovy and Ozempic), participants lost an average of 15-20% of their body weight over 68 weeks. For someone weighing 200 pounds, that’s potentially 30-40 pounds.

Tirzepatide (Mounjaro and Zepbound) shows even more dramatic results in some studies, with average weight loss around 20-25% of body weight. Some participants lost significantly more.

But here’s the reality check: these are averages. Some people lose more, some lose less. Results vary based on your starting weight, diet, exercise, genetics, and a bunch of other factors. This isn’t a magic bullet that works exactly the same for everyone.

What Real Users Are Experiencing

Beyond the clinical trials, real-world experiences paint an interesting picture. Most people report:

  • Significant reduction in food cravings and “food noise”
  • Feeling satisfied with much smaller portions
  • Less interest in snacking between meals
  • Reduced desire for sweet or high-fat foods
  • Steady, consistent weight loss over months

The key word here is “consistent.” This isn’t rapid weight loss that disappears as soon as you stop. It’s gradual, sustainable loss that happens because your relationship with food fundamentally changes while you’re on the medication.

The Side Effects Nobody Wants to Talk About (But We’re Going To)

Scientific illustration showing the human digestive system with the pancreas and intestines highlighted in blue and green tones against a neutral background, medical textbook style

Let’s be real: every medication has side effects, and GLP-1 drugs are no exception. You need to know what you might be signing up for.

The most common side effects are gastrointestinal, and they can be rough:

  • Nausea – This is the big one, especially when starting or increasing doses
  • Vomiting – Less common than nausea but definitely happens
  • Diarrhea – Pretty self-explanatory and not fun
  • Constipation – Ironically, some people get this instead of diarrhea
  • Stomach pain – Can range from mild discomfort to more significant cramping

The good news? For most people, these side effects improve over time as your body adjusts. Starting with a low dose and slowly increasing helps minimize the misery.

The More Serious Stuff

There are also some rarer but more serious potential risks. These medications come with warnings about potential thyroid tumors (based on animal studies), pancreatitis risk, and gallbladder problems. If you have a personal or family history of certain conditions, these medications might not be appropriate for you.

This is absolutely not something to start without medical supervision. A qualified healthcare provider needs to evaluate whether the benefits outweigh the risks for your specific situation.

Who Should (and Shouldn’t) Consider GLP-1 Medications

So who’s actually a good candidate for these medications? The FDA has approved them for people with a BMI of 30 or higher, or a BMI of 27 or higher with at least one weight-related health condition (like high blood pressure or type 2 diabetes).

That said, BMI isn’t the whole story. Your doctor should consider your overall health, weight loss history, other medications you’re taking, and your personal health goals.

When GLP-1 Might Not Be Right for You

These medications aren’t appropriate if you:

  • Have a personal or family history of medullary thyroid carcinoma
  • Have Multiple Endocrine Neoplasia syndrome type 2
  • Are pregnant or planning to become pregnant soon
  • Have a history of severe gastrointestinal disease
  • Have a history of pancreatitis

And honestly? If you only have 10-15 pounds to lose and no other health issues, these medications are probably overkill. They’re designed for people dealing with obesity or significant weight-related health problems.

The Money Talk: What This Actually Costs

A modern white bathroom scale on clean tile flooring next to a measuring tape coiled naturally, bright natural window light, minimalist composition

Let’s address the elephant in the room: these medications are expensive. Like, really expensive. Without insurance, you’re looking at $900-$1,500 per month. Yes, per month.

Insurance coverage is all over the map. Some plans cover GLP-1 medications for diabetes but not for weight loss. Some cover them for weight loss but with strict requirements. Some don’t cover them at all.

Ways to Make It More Affordable

If you’re serious about trying these medications, here are some options:

  • Check if your insurance covers them (call and ask specifically about weight management coverage)
  • Look into manufacturer savings programs – companies like Novo Nordisk and Eli Lilly offer significant discounts for eligible patients
  • Consider compounded versions from reputable pharmacies (though proceed with caution here)
  • Ask your doctor about starting with the diabetes-approved version if you have diabetes or prediabetes

FYI, the cost situation is genuinely frustrating for many people who could benefit from these medications but can’t afford them. It’s a legitimate barrier that we need to acknowledge.

What Happens When You Stop Taking It?

Here’s the uncomfortable truth: most people regain at least some weight when they stop taking GLP-1 medications. Studies show that within a year of stopping, people typically regain around two-thirds of the weight they lost.

Why? Because the medication was doing the heavy lifting of appetite suppression. When that goes away, your natural hunger signals come back full force. For many people, this means returning to previous eating patterns and, consequently, previous weight.

This raises the question: are these medications something you need to take indefinitely? For many people, the answer might be yes—similar to how people with high blood pressure take medication long-term to manage their condition.

The key is using the time on the medication to build sustainable habits: learning what appropriate portions feel like, developing a regular exercise routine, addressing emotional eating patterns, and building a healthy relationship with food. That way, even if you do stop the medication, you’re not starting from square one.

Combining GLP-1 with Lifestyle Changes

Overhead view of a half-empty dinner plate with fork and knife placed at finished position, suggesting reduced appetite and portion control, soft restaurant lighting

Here’s something important: these medications work best when combined with lifestyle changes, not as a replacement for them. I know, I know—that’s not what anyone wants to hear. But it’s true.|

Think of GLP-1 as a tool that makes healthy lifestyle changes actually achievable. When you’re not constantly battling overwhelming hunger, it becomes so much easier to:

  • Stick to appropriate portion sizes
  • Choose nutritious foods over junk
  • Exercise regularly (because you have more energy when you’re not carrying extra weight)
  • Break cycles of emotional eating

The medication creates a window of opportunity where making better choices doesn’t feel like torture. That’s powerful, but you still need to walk through that window and actually make those choices.

The Protein Priority

One important tip from people who’ve had success: prioritize protein. Because you’re eating less overall, you need to make sure you’re getting enough protein to maintain muscle mass. Losing weight is great, but losing muscle along with fat isn’t ideal.

Aim for high-protein recipes at every meal, even if it’s a small portion. Your body will thank you.

Frequently Asked Questions

How quickly will I see results with GLP-1 medications?

Most people start seeing weight loss within the first few weeks, but significant results take time. The clinical trials showed the most dramatic weight loss occurred over 4-6 months and continued up to 68 weeks. This is a marathon, not a sprint. You might lose 1-2 pounds per week on average, which is actually a healthy rate of weight loss that’s more likely to be sustainable.

Can I drink alcohol while taking GLP-1 medications?

Technically yes, but many people find their tolerance and desire for alcohol decreases significantly on these medications. Some people report feeling sick after drinking even small amounts. The medications can also slow down how quickly your body processes alcohol. IMO, it’s best to be really cautious with alcohol, start with very small amounts if you do drink, and pay attention to how your body responds.

Will I need to take this medication forever?

That’s the million-dollar question, and honestly, there’s no one-size-fits-all answer. Some people may need to take these medications long-term to maintain weight loss, similar to how people manage other chronic conditions with medication. Others might be able to stop after losing weight and maintaining it for a while with lifestyle changes. This is definitely a conversation to have with your healthcare provider based on your individual situation and goals.

What’s the difference between Ozempic, Wegovy, Mounjaro, and Zepbound?

Ozempic and Wegovy both contain semaglutide—Ozempic is FDA-approved for diabetes, while Wegovy is approved specifically for weight loss (and comes in higher doses). Mounjaro and Zepbound both contain tirzepatide—Mounjaro is approved for diabetes, Zepbound for weight loss. Tirzepatide works on two hormone receptors (GLP-1 and GIP) instead of just one, which might explain why some studies show slightly better weight loss results. Your doctor can help determine which might be best for you.

Are there natural ways to increase GLP-1 without medication?

Yes, though the effects are much more modest than with medication. Eating protein and fiber-rich foods, exercising regularly, getting adequate sleep, and managing stress can all help optimize your body’s natural GLP-1 production. Some foods like leafy greens, nuts, and fermented foods may support GLP-1 release. But let’s be real: if natural methods alone were enough for everyone, we wouldn’t need these medications in the first place.

What about those compounded versions I’m seeing advertised online?

Because of shortages of brand-name GLP-1 medications, compounding pharmacies started making their own versions. Some are legitimate operations creating quality products, but others may not be. If you’re considering a compounded version, make sure you’re working with a reputable compounding pharmacy through a licensed healthcare provider. The FDA has raised concerns about safety and quality control with some of these products. Cheaper isn’t always better when it comes to injectable medications.

The Bottom Line on GLP-1 Weight Loss

GLP-1 medications represent a genuinely significant advancement in weight loss treatment. They’re not perfect, they’re not cheap, and they’re definitely not right for everyone. But for people who’ve struggled with obesity and haven’t had success with diet and exercise alone, they can be life-changing.

The science is solid, the results are real, and the potential benefits extend beyond just the number on the scale—improved blood sugar, reduced cardiovascular risk, better mobility, and for many people, a completely transformed relationship with food.

But here’s the thing: these medications work best as part of a comprehensive approach to health, not as a standalone solution. You still need to address the lifestyle factors that contribute to weight gain. You still need medical supervision. And you need to go into this with realistic expectations about side effects, costs, and the possibility of long-term use.

If you’re considering GLP-1 medications for beginners, have an honest conversation with your healthcare provider about whether they make sense for you. Look at your full health picture, not just your weight. And whatever you decide, remember that taking control of your health—in whatever form that takes—is something to be proud of.

Quick Tossed Pasta That Secretly Delivers a High Protein Dinner Recipe – Fast, Satisfying, and Weeknight-Friendly

If you love a comforting bowl of pasta but want to keep dinner high in protein, this recipe is your new go-to. It’s fast, simple, and uses everyday ingredients, but it still feels a little special. The sauce is creamy without cream, the flavors are bright, and it all comes together in under 25 minutes.

Best of all, each serving packs serious protein without relying on heavy meat. It’s the kind of weeknight meal that makes you feel like you pulled off something clever.

What Makes This Recipe So Good

Cooking process: Sautéed garlic and white beans in a wide stainless skillet, some beans lightly mas
  • High protein without fuss: We lean on Greek yogurt, white beans, and a sprinkle of Parmesan to build a protein-rich sauce that tastes indulgent.
  • Weeknight fast: The sauce comes together in the time it takes to boil the pasta. No long simmering or complicated steps.
  • Balanced and bright: Lemon, garlic, and fresh herbs keep the dish light, while olive oil and Parmesan give it cozy, savory depth.
  • Flexible: Use any short pasta, switch up the greens, or add grilled chicken or shrimp if you’d like even more protein.
  • One bowl appeal: Everything gets tossed together, so each bite has creamy sauce, tender pasta, and a little crunch from toasted nuts.

What You’ll Need

  • 8 ounces short pasta (penne, rotini, or shells; use chickpea or lentil pasta for extra protein)
  • 1 tablespoon olive oil
  • 3 cloves garlic, minced
  • 1 can (15 ounces) white beans (cannellini or great northern), drained and rinsed
  • 1/2 cup low-fat Greek yogurt (plain)
  • 1/3 cup grated Parmesan cheese (plus more for serving)
  • Zest and juice of 1 lemon
  • 2 cups baby spinach or chopped kale
  • 1/2 cup reserved pasta water (you may not need all of it)
  • 1/4 cup toasted chopped almonds or pine nuts (optional but great for texture)
  • 1/4 cup chopped fresh herbs (parsley, basil, or a mix)
  • 1/2 teaspoon red pepper flakes (optional)
  • Kosher salt and freshly ground black pepper, to taste

Step-by-Step Instructions

Close-up detail: Silky Greek-yogurt-and-Parmesan sauce coating rotini, ribbons of wilted spinach jus
  1. Boil the pasta: Bring a large pot of salted water to a boil.Cook the pasta according to package directions until al dente. Before draining, reserve about 1 cup of pasta water. Drain and set aside.
  2. Sauté the aromatics: In a large skillet, heat the olive oil over medium.Add the minced garlic and cook for 30–60 seconds until fragrant, not browned.
  3. Add beans and season: Stir in the white beans, a pinch of salt, black pepper, and red pepper flakes if using. Cook for 2–3 minutes, lightly mashing some beans with the back of a spoon to thicken.
  4. Build the creamy base: Lower the heat. Stir in the Greek yogurt, Parmesan, lemon zest, and half the lemon juice.Add a splash of reserved pasta water to loosen. You want a creamy, glossy sauce.
  5. Fold in greens: Add the spinach (or kale). Toss until just wilted, about 1–2 minutes.If the sauce thickens too much, add more pasta water a little at a time.
  6. Toss with pasta: Add the drained pasta to the skillet and toss to coat. Taste and adjust with more lemon juice, salt, and pepper. Aim for bright and savory.
  7. Finish and serve: Remove from heat.Sprinkle with fresh herbs and toasted nuts. Top with extra Parmesan if you like and serve warm.

How to Store

  • Refrigerate: Store leftovers in an airtight container for up to 3 days.
  • Reheat gently: Warm on the stove over low heat with a splash of water or milk to loosen the sauce. Microwave in 30-second bursts, stirring in between.
  • Avoid freezing: The yogurt-based sauce can separate in the freezer.Fresh is best.
Tasty top view: Overhead shot of the finished high-protein tossed pasta in a wide, shallow ceramic b

Macro Count

Macro Regular Pasta Chickpea Pasta
Protein (total recipe) 76 g 94 g
Carbs (total recipe) 237 g 196 g
Protein per serving 19 g 24 g
Carbs per serving 59 g 49 g
Fat per serving 7 g 8 g
Fiber per serving 6 g 9 g
Calories per serving 374 kcal 357 kcal

Why This Is Good for You

  • Protein power: Greek yogurt and white beans add complete and complementary proteins that help keep you full and support muscle repair.
  • Fiber and gut health: Beans and greens bring fiber, which supports digestion and steady energy.
  • Healthy fats: Olive oil and nuts add monounsaturated fats that support heart health and make the dish satisfying.
  • Micronutrients: Spinach or kale provides iron, folate, and vitamin K. Lemon adds vitamin C, which helps with iron absorption from plant sources.

Pitfalls to Watch Out For

  • Curdled sauce: If the skillet is too hot when you add the yogurt, it can split. Keep the heat low and stir in a bit of pasta water to create a buffer.
  • Underseasoning:  Beans and yogurt need enough salt, acid, and pepper.Taste at the end and adjust with salt and lemon.
  • Dry pasta: If the sauce feels stiff, you probably need more pasta water. Add a splash, toss, and reassess.
  • Overcooked greens: Wilt just until tender and bright. Overcooked greens can turn dull and bitter.

Alternatives

  • Protein swaps: Use cottage cheese instead of yogurt for extra protein and a thicker texture.Or add cooked chicken breast, shrimp, or flaked canned tuna.
  • Vegan version: Replace Greek yogurt with unsweetened thick oat yogurt or silken tofu blended until creamy. Use nutritional yeast instead of Parmesan.
  • Different beans: Chickpeas or butter beans work well and hold their shape. Lentils add earthiness and even more fiber.
  • Gluten-free: Choose a certified gluten-free pasta.Chickpea or lentil pasta boosts protein per serving.
  • Greens and add-ins: Swap spinach for arugula, Swiss chard, or peas. Sun-dried tomatoes, roasted red peppers, or capers add punchy flavor.
  • Creamier finish: Stir in a tablespoon of light cream cheese or a pat of butter for an extra silky sauce.

FAQ

Can I make this without dairy?

Yes. Use a thick plant-based yogurt or blend silken tofu until smooth, then mix with lemon and nutritional yeast.

Adjust salt and add a bit more olive oil for body.

How do I keep the yogurt from curdling?

Lower the heat to low before adding it, and stir in a little pasta water first. The starch and temperature control help the sauce stay smooth.

What pasta shape works best?

Short, ridged shapes like rotini, penne, or shells hold the creamy sauce well. If using long pasta, linguine or fettuccine also works.

Can I meal prep this?

Yes, but cook the pasta slightly shy of al dente and keep a small container of water or milk for reheating.

The sauce loosens nicely with a splash of liquid.

How much protein is in a serving?

It varies by pasta choice, but using chickpea pasta, beans, Greek yogurt, and Parmesan, you can expect roughly 25–35 grams per serving for a hearty bowl.

What if I don’t like beans?

Blend the beans into the sauce with a bit of pasta water for a smoother texture, or swap with cottage cheese for similar protein and creaminess.

Is the lemon essential?

It brightens the dish and balances the richness. If you’re out, use a splash of white wine vinegar or apple cider vinegar to add acidity.

In Conclusion

This quick tossed pasta is the kind of dinner that checks every box: fast, creamy, and surprisingly high in protein. It’s flexible enough for whatever you have in the pantry and light enough to keep you energized.

With a handful of simple ingredients and a smart sauce, you get comfort and nutrition in the same bowl. Keep it in your weeknight rotation and make it your own with the swaps and add-ins you love.

Final plated dish: Restaurant-quality presentation of penne in creamy bean-yogurt sauce with spinach

No-Fuss One-Pot Wonder That Doubles as a High Protein Chicken Dinner Recipe – Simple, Satisfying, and Quick

If your weeknights are hectic, this one-pot wonder will be your new favorite dinner. It’s hearty, loaded with protein, and comes together with minimal prep and virtually no cleanup. Think juicy chicken, tender beans, and veggies simmered in a savory tomato base—all cooked in one pot.

You’ll get a balanced meal that tastes like it simmered all day, without the effort. It’s quick enough for Tuesday and comforting enough for Sunday.

What Makes This Special

Close-up detail: Sizzling seared chicken thigh pieces nestled in a tomato-broth base with quinoa pea

This recipe stands out because it combines accessible pantry staples with fresh, colorful ingredients for big flavor and great nutrition. It’s built around lean protein and fiber, so it keeps you full and energized without feeling heavy.

Everything cooks in one pot, so you won’t be juggling pans or scrubbing a stack of dishes afterward. It’s also incredibly flexible—swap the protein, switch the beans, add more veggies, or tweak the spices to suit your taste. Best of all, leftovers are even better the next day.

Shopping List

  • Protein: 1.5 pounds boneless, skinless chicken thighs (or breasts), cut into bite-size pieces
  • Aromatics: 1 large yellow onion (diced), 3 cloves garlic (minced)
  • Veggies: 1 red bell pepper (diced), 2 cups chopped baby spinach (or kale), 1 cup cherry tomatoes (halved, optional)
  • Beans: 1 can (15 oz) cannellini or black beans, drained and rinsed
  • Grain/Starch: 1 cup uncooked quinoa (rinsed) or brown rice (see notes in steps)
  • Liquids: 3 cups low-sodium chicken broth, 1 can (14.5 oz) crushed tomatoes
  • Spices: 1.5 teaspoons smoked paprika, 1 teaspoon ground cumin, 1 teaspoon dried oregano, 1/2 teaspoon chili flakes (optional)
  • Seasoning: Kosher salt and black pepper
  • Fat: 2 tablespoons olive oil
  • Finishing: Juice of 1/2 lemon, 1/4 cup chopped fresh parsley or cilantro
  • Optional add-ins: 1/2 cup crumbled feta, sliced olives, or grated Parmesan

Step-by-Step Instructions

Cooking process: Overhead shot of the one-pot simmer stage—chicken returned to the pot with crushe
  1. Prep the basics: Dice the onion and bell pepper, mince the garlic, and cut the chicken into bite-size pieces.

    Rinse the quinoa thoroughly under cold water to remove bitterness.

  2. Heat the pot: In a large heavy pot or Dutch oven, heat olive oil over medium-high. Add chicken, season with salt and pepper, and sear for 4–5 minutes until lightly browned. It doesn’t need to be cooked through yet.

    Transfer to a plate.

  3. Sauté aromatics: In the same pot, add onion and bell pepper. Cook for 3–4 minutes until softened. Stir in garlic and cook 30 seconds until fragrant.
  4. Build flavor: Add smoked paprika, cumin, oregano, and chili flakes.

    Stir for 30 seconds to bloom the spices.

  5. Combine the base: Pour in crushed tomatoes and chicken broth. Stir in the rinsed quinoa and beans. Bring to a gentle boil.
  6. Simmer with chicken: Return the chicken (and any juices) to the pot.

    Reduce heat to low, cover, and simmer for 18–20 minutes, stirring once or twice, until the quinoa is tender and the liquid is mostly absorbed.

  7. Finish with greens: Stir in spinach and cherry tomatoes. Cook uncovered for 2–3 minutes until the greens wilt and the mixture thickens slightly.
  8. Season and brighten: Squeeze in lemon juice, taste, and adjust salt and pepper. If you like, add feta, olives, or Parmesan for extra richness.
  9. Serve: Ladle into bowls and top with chopped parsley or cilantro.

    It’s great on its own or with a side of crusty bread.

  10. Note for brown rice: If using brown rice instead of quinoa, increase broth to 4 cups and simmer covered for 35–40 minutes, adding the beans and spinach in the last 10 minutes so they don’t overcook.

How to Store

  • Fridge: Cool completely, then store in airtight containers for up to 4 days.
  • Freezer: Portion into freezer-safe containers. Freeze for up to 3 months. Thaw in the fridge overnight before reheating.
  • Reheating: Warm on the stovetop over medium heat with a splash of broth or water, or microwave in 60–90 second bursts, stirring between intervals.
  • Meal prep tip: Divide into single servings for grab-and-go lunches.

    Add fresh herbs or a squeeze of lemon when serving to wake up the flavors.

Final dish presentation: Beautifully plated one-pot chicken, quinoa, and beans in a wide, shallow wh

Benefits of This Recipe

  • High protein: Chicken, beans, and quinoa create a complete, balanced protein profile that keeps you full longer.
  • One-pot simplicity: Minimal dishes, minimal stress, maximum payoff.
  • Fiber-rich: Beans, quinoa, and veggies support digestion and steady energy.
  • Budget-friendly: Uses pantry staples and flexible ingredients you can swap based on what you have.
  • Great for leftovers: Flavors meld beautifully by day two, making it perfect for meal prep.

Pitfalls to Watch Out For

  • Skipping the quinoa rinse: Unrinsed quinoa can taste bitter. Rinse well in a fine-mesh sieve.
  • Boiling too hard: A rapid boil can cause uneven cooking and soggy grains. Keep it at a gentle simmer.
  • Overcrowding the chicken: If you pile it in, it steams instead of browns.

    Sear in two batches if needed.

  • Under-seasoning: Taste at the end and adjust salt, pepper, and lemon. The right seasoning makes the dish pop.
  • Adding greens too early: Spinach or kale can overcook and lose color if added too soon. Stir them in at the end.

Variations You Can Try

  • Turkey or tofu swap: Use ground turkey (brown it first) or extra-firm tofu cubes (pan-sear before adding for texture).
  • Mediterranean twist: Add olives, artichoke hearts, and feta, and finish with fresh dill.
  • Southwest style: Use black beans, corn, and a dash of chipotle.

    Top with avocado and lime.

  • Veggie-heavy version: Stir in zucchini or mushrooms with the onions and peppers for more bulk and nutrients.
  • Low-carb option: Skip the quinoa and reduce broth to 1.5 cups. Simmer until the chicken is cooked and sauce thickens.
  • Seafood spin: Use shrimp instead of chicken. Add them in the last 5 minutes of cooking so they don’t overcook.

FAQ

Can I use chicken breasts instead of thighs?

Yes.

Chicken breasts work well—just be careful not to overcook them. Cut into equal pieces and follow the same steps. If you worry about dryness, reduce the simmer time by 2–3 minutes and check for doneness early.

What if I don’t have quinoa?

Brown rice, farro, or orzo are all good substitutes.

Adjust liquid and cook time accordingly: brown rice needs more broth and time, while orzo needs slightly less liquid and cooks faster.

How do I make it spicier?

Add extra chili flakes, a pinch of cayenne, or a diced jalapeño with the onions. You can also finish with hot sauce to taste.

Can I make this dairy-free and gluten-free?

It’s naturally dairy-free if you skip the feta and Parmesan. It’s also gluten-free as written, assuming your broth and canned ingredients are certified gluten-free.

How can I boost the protein even more?

Stir in an extra can of beans, add chopped cooked chicken sausage, or finish with Greek yogurt on top for a creamy, high-protein garnish.

What’s the best pot to use?

A 5–6 quart Dutch oven or heavy-bottomed pot is ideal.

It distributes heat evenly and prevents sticking, especially when cooking grains.

Can I cook this in an Instant Pot?

Yes. Sauté aromatics and brown the chicken on Sauté mode, then add remaining ingredients (use 2.5 cups broth with quinoa). Pressure cook on High for 1 minute, natural release for 10 minutes, then quick release, stir in greens, and finish with lemon.

Final Thoughts

This no-fuss one-pot dinner delivers comfort, protein, and convenience in every spoonful.

It’s the kind of reliable recipe you’ll keep on repeat because it’s flexible, flavorful, and easy to clean up. Make it your own with the swaps you love, and enjoy a wholesome meal without the weeknight chaos. Simple ingredients, one pot, and a delicious payoff—what more do you need?

Tasty top view: Overhead hero shot of the finished one-pot wonder served family-style in a matte bla

Caramelized Veggie Skillet That Steps Up as a High Protein Dinner Recipe – Simple, Satisfying, and Weeknight-Friendly

Sweet, savory, and packed with protein, this caramelized veggie skillet is a weeknight game-changer. It brings deep flavor from browned vegetables, hearty beans, and a punchy yogurt-tahini drizzle that ties everything together. You get the kind of richness you’d expect from a slow-cooked dish, but it all happens in one pan.

It’s flexible, budget-friendly, and easy to make with pantry staples. If you want more protein without grilling a steak, this is the kind of recipe that steps up and delivers.

Why This Recipe Works

Close-up detail: Golden-crisp tofu cubes and chickpeas sizzling in a cast-iron skillet, edges deeply

This skillet leans on high-heat caramelization to build flavor fast. When vegetables like onions, carrots, and peppers hit a hot pan, their natural sugars brown and turn sweet and complex.

Adding chickpeas and tofu bulks up the protein while also crisping on the edges for texture.

The sauce is simple but smart: a quick blend of Greek yogurt, tahini, lemon, and garlic adds creaminess and brightness without weighing things down. A handful of herbs and a splash of vinegar at the end wake up the whole pan. You get a balanced plate—sweet, savory, creamy, and a little tangy—in under 40 minutes.

What You’ll Need

  • Olive oil (2–3 tablespoons)
  • Yellow onion (1 large, thinly sliced)
  • Carrots (2 medium, thin coins)
  • Red bell pepper (1 large, sliced)
  • Zucchini (1 medium, half-moons)
  • Cremini or button mushrooms (2 cups, sliced)
  • Garlic (3 cloves, minced)
  • Chickpeas (1 can, drained and patted dry)
  • Extra-firm tofu (14 oz, pressed and cubed)
  • Smoked paprika (1 teaspoon)
  • Ground cumin (1 teaspoon)
  • Crushed red pepper (optional, 1/4 teaspoon)
  • Salt and black pepper (to taste)
  • Balsamic vinegar (1 tablespoon)
  • Fresh parsley or cilantro (1/4 cup, chopped)

For the high-protein creamy drizzle:

  • Plain Greek yogurt (3/4 cup, 2% or 5%)
  • Tahini (2 tablespoons)
  • Lemon juice (2 tablespoons)
  • Garlic (1 small clove, grated)
  • Water (to thin)
  • Salt and pepper (to taste)

Optional add-ons for extra protein or carbs:

  • Cooked quinoa, farro, or brown rice
  • Feta cheese or shaved Parmesan
  • Toasted pumpkin seeds or almonds

Step-by-Step Instructions

Cooking process: Overhead shot of the skillet right after deglazing—caramelized mixed vegetables (
  1. Prep the produce and protein. Press the tofu for 10–15 minutes, then cube it.

    Pat the chickpeas dry with a towel so they crisp. Slice all veggies similar in thickness so they cook evenly.

  2. Make the yogurt-tahini drizzle. Whisk Greek yogurt, tahini, lemon juice, grated garlic, a pinch of salt, and a splash of water until pourable. Adjust lemon and salt to taste.

    Set aside.

  3. Get the pan hot. Heat 1 tablespoon olive oil in a large skillet over medium-high until shimmering. Add the onions and carrots with a pinch of salt. Cook 4–5 minutes, stirring occasionally, until edges start to brown.
  4. Layer in the peppers and zucchini. Add 1 teaspoon more oil if needed.

    Cook another 4–5 minutes until veggies soften and pick up color. Avoid stirring constantly; let them sit to caramelize.

  5. Add mushrooms and garlic. Push veggies to the edges, add a drizzle of oil, then mushrooms in the center. Let them sear 2 minutes before stirring so they brown, not steam.

    Stir in garlic and cook 30 seconds.

  6. Crisp the protein. Transfer veggies to a bowl. Add 1 tablespoon oil to the pan. Add chickpeas and tofu in a single layer.

    Season with smoked paprika, cumin, salt, pepper, and crushed red pepper if using. Cook 5–7 minutes, turning occasionally, until golden and crisp.

  7. Bring it together. Return veggies to the pan. Splash in balsamic vinegar and toss over medium heat for 1–2 minutes to deglaze and glaze the mixture.

    Taste and adjust salt, pepper, or acid.

  8. Finish and serve. Turn off the heat. Stir in chopped parsley or cilantro. Serve the skillet as is, or over quinoa or brown rice.

    Drizzle generously with the yogurt-tahini sauce. Add feta or seeds if you like.

How to Store

  • Fridge: Store the veggie-protein mixture in an airtight container for up to 4 days. Keep the yogurt-tahini drizzle separate for the best texture.
  • Freezer: The skillet mix freezes well for up to 2 months.

    Thaw overnight in the fridge. The yogurt sauce does not freeze well—make that fresh.

  • Reheat: Rewarm the skillet on the stove over medium heat with a splash of water or broth, or microwave in 60–90 second bursts, stirring between rounds. Add sauce after reheating.
Final dish presentation: Beautifully plated caramelized veggie skillet bowl over fluffy quinoa, topp

Why This is Good for You

  • High protein: Tofu and chickpeas team up to deliver a solid protein count, especially when paired with Greek yogurt sauce.

    It helps keep you full and supports muscle repair.

  • Fiber-rich: Beans and a mix of colorful vegetables provide fiber for digestion, steady energy, and overall gut health.
  • Healthy fats: Olive oil and tahini bring heart-healthy fats that support nutrient absorption and satiety.
  • Balanced nutrition: Carbs from veggies, protein from legumes and tofu, and fats from the drizzle give you a well-rounded plate without feeling heavy.

What Not to Do

  • Don’t crowd the pan. Overloading leads to steaming, not caramelizing. If needed, cook in batches for better browning.
  • Don’t skip drying the chickpeas and tofu. Moisture is the enemy of crisp edges. Pat everything dry before it hits the pan.
  • Don’t over-stir. Let veggies sit to develop color.

    Stirring too often prevents the flavorful browning you want.

  • Don’t add the sauce too early. Heat can split yogurt and dull the lemon flavor. Drizzle after cooking.

Alternatives

  • Protein swaps: Use tempeh, seitan, rotisserie chicken, or turkey sausage. For pescatarian, add sautéed shrimp at the end.
  • Bean swaps: White beans or black beans work well.

    Lentils (pre-cooked) add an earthy note and extra protein.

  • Veggie swaps: Try sweet potatoes, broccoli, cauliflower, or green beans. Harder veggies need a few extra minutes.
  • Sauce swaps: Skip tahini and use hummus whisked with lemon, or a quick pesto yogurt. For dairy-free, use a thick unsweetened coconut yogurt and add extra lemon.
  • Spice route: Go Italian with oregano and fennel seed, or Moroccan-inspired with ras el hanout.

    A spoon of harissa is great for heat and depth.

  • Serving ideas: Pile over grains, tuck into warm pitas, or spoon over a bed of greens for a warm salad. Add a fried egg on top for even more protein.

FAQ

How much protein is in a serving?

It depends on portions, but a typical serving with tofu, chickpeas, and yogurt drizzle lands around 25–35 grams of protein. Adding quinoa or an egg can push that higher.

Can I make this without tofu?

Yes.

Double the chickpeas or swap in tempeh, seitan, or pre-cooked chicken. Keep the same seasoning and cooking steps for crisp edges.

What if I don’t have tahini?

Use hummus, almond butter, or even a little olive oil whisked into the yogurt with extra lemon and garlic. Aim for a creamy, tangy sauce that coats lightly.

How do I get better caramelization?

Use high heat, a large skillet, and dry ingredients.

Don’t move the vegetables too often, and add oil in small amounts as the pan dries. Salt lightly early, then adjust at the end.

Is this good for meal prep?

Absolutely. Cook the skillet and store it separately from the sauce.

Portion into containers with grains, add sauce right before eating, and refresh with a squeeze of lemon.

Can I make it spicy?

Yes. Add crushed red pepper, chili powder, or a spoon of harissa or sambal. Taste as you go so the heat doesn’t overpower the caramelized sweetness.

What pan should I use?

A large stainless steel or cast-iron skillet works best for browning.

Nonstick is fine but won’t caramelize quite as deeply.

How do I keep the tofu from sticking?

Use a well-heated pan, dry tofu, and enough oil. Let the tofu release naturally—if it’s sticking, give it another minute before turning.

Final Thoughts

This caramelized veggie skillet is proof that simple ingredients can deliver big flavor and serious protein. It’s flexible enough for whatever’s in your crisper, and it plays well with grains, greens, or a warm pita.

Make it once, and you’ll find yourself coming back to it on busy nights. Keep the sauce in your rotation too—it’s a quick upgrade for almost anything you cook. Dinner, solved.

Tasty top view: Top-down hero shot of the assembled skillet served family-style in a wide stainless

Low-Carb And High-Protein Cottage Cheese Wrap – Easy Lunch

If you’re craving a soft, flexible wrap that’s low in carbs and packed with protein, this simple recipe has your back. It uses just two ingredients—eggs and cottage cheese—to create a tender, crepe-like wrap you can fill with anything you like. No specialty flours, no odd gums, no fuss.

It cooks quickly, tastes mild, and works for breakfast, lunch, or a snack. Once you try it, you’ll keep a batch in the fridge for easy meals all week.

Why This Recipe Works

Final dish presentation: Two tightly rolled cottage cheese wraps sliced on a diagonal, stacked sligh

This wrap is a clever balance of eggs and cottage cheese. The eggs give structure, while the cottage cheese blends into a creamy batter that cooks into a pliable, slightly springy wrap.

  • High protein, low carb: Each wrap delivers solid protein with minimal carbs, making it great for low-carb or high-protein goals.
  • Just two ingredients: You probably have eggs and cottage cheese already.No complex shopping list.
  • Quick and forgiving: The batter blends in seconds, and the wrap cooks like a thin pancake. Even first-timers get good results.
  • Neutral flavor: Mild taste plays well with sweet or savory fillings. Add spices if you want, but it’s not required.
  • Flexible texture: It’s sturdy enough to hold fillings and soft enough to roll without cracking.

Ingredients

  • Large eggs (2 per wrap)
  • Cottage cheese (1/4 cup per wrap; small curd or whipped)
  • Optional: Salt and pepper
  • Optional flavor boosters: Garlic powder, onion powder, smoked paprika, Italian seasoning, or a pinch of chili flakes
  • Optional add-ins: Fresh herbs (chives, parsley, dill)
  • For baking: Flat sheet pan lined with parchment paper.

Step-by-Step Instructions

Tasty top view: Overhead shot of a sweet version—cooked wrap used as a flatbread, spread with Gree
  1. Blend all ingredients in a processor until smooth.
  2. Pour on cookie sheet lined with parchment paper.
  3. With a spatula, shape into a rectangle
  4. Bake at 375 for 20-25 minutes or until golden
  5. Cool slightly: Transfer to a plate and let it sit for 1–2 minutes. This helps the wrap become more flexible for rolling.
  6. Cut to size
  7. Fill and serve: Add your favorite fillings and roll, fold, or use as a flatbread. Repeat the process for more wraps.

How to Store

  • Refrigerate: Stack wrap with parchment between each one and store in an airtight container for up to 4 days.
  • Freeze: Wrap individually with parchment and freezer-safe bags. Freeze up to 2 months. Thaw in the fridge or on the counter for 20–30 minutes.
  • Reheat: Warm in a dry nonstick skillet over low heat for 30–60 seconds per side, or microwave for 10–15 seconds. Don’t overheat to avoid rubbery texture.
Cooking process: Overhead shot of a warmed tortilla mid-assembly with a neat, even layer of cottage

Why This is Good for You

  • Protein-packed: Eggs and cottage cheese deliver complete protein to keep you full and support muscle maintenance.
  • Low in carbs: Ideal if you’re managing blood sugar or following a low-carb lifestyle.
  • Rich in nutrients: Eggs offer choline, B vitamins, and fat-soluble vitamins; cottage cheese provides calcium and additional B vitamins.
  • Customizable fats and sodium: Use low-fat or full-fat cottage cheese based on your goals, and season lightly if you watch sodium intake.

What Not to Do

  • Don’t skip blending: Unblended cottage cheese will leave curds, making the wrap tear-prone and uneven.
  • Don’t use high heat: Too hot and it browns fast outside but stays undercooked inside.Medium heat works best.
  • Don’t pour too thick: A thick layer cooks like an omelet, not a wrap. Keep it thin for flexibility.
  • Don’t flip too early: If the surface is still wet, it will stick and tear. Wait until it looks set and the edges lift easily.
  • Don’t overload with wet fillings: Too much moisture can make the wrap soggy.Pat watery ingredients dry first.

Alternatives

  • Dairy-free idea: This recipe depends on cottage cheese, but you can experiment with unsweetened, high-protein dairy-free yogurts. Blend 2 eggs with 3 tablespoons thick coconut or almond yogurt and a pinch of salt. Texture won’t be identical, but it’s close.
  • Flavor twists: Add cumin and chili powder for a taco-style wrap, or dill and lemon zest for a fresh, herby version.
  • Sweet version: Skip salt and add a touch of vanilla and cinnamon.Fill with berries and a smear of nut butter or Greek yogurt.
  • Extra fiber: Whisk in 1 teaspoon ground flaxseed or psyllium husk to the blended batter. It thickens slightly and adds fiber without many carbs.
  • More tender or sturdier: For a softer wrap, add 1 tablespoon milk or water to the batter. For a sturdier one, cook a touch longer on the first side to dry it out slightly.

FAQ

Can I make a batch ahead of time?

Yes.

Make several wraps at once, cool them, and store with parchment between layers in an airtight container for up to 4 days. They reheat quickly in a skillet or microwave.

Do I need a blender?

A blender or immersion blender works best. If you only have a whisk, use whipped or small-curd cottage cheese and whisk thoroughly until as smooth as possible, but blending yields a better texture.

Why is my wrap sticking?

Either the pan wasn’t hot enough, there wasn’t enough fat in the pan, or you tried to flip too soon.

Use a reliable nonstick skillet, medium heat, and wait until the top looks set before flipping.

Can I bake the batter instead?

Yes. Pour the blended batter onto a parchment-lined sheet, spread thin, and bake at 375°F (190°C) for 6–8 minutes until set. Peel off the parchment, cool briefly, and use as a wrap.

How many wraps does this make?

The base recipe makes one large wrap per batch of 2 eggs and 1/4 cup cottage cheese.

Multiply ingredients for more. If your pan is smaller, you may get two smaller wraps.

What fillings work best?

Try turkey, cheese, and spinach; tuna salad; grilled chicken with avocado; hummus and roasted veggies; or scrambled eggs and salsa. For sweet, go with berries, peanut butter, and a drizzle of honey or sugar-free syrup.

Is this gluten-free?

Yes.

Eggs and cottage cheese are naturally gluten-free. Check any seasonings or fillings to be sure they are, too.

Which cottage cheese should I use?

Small-curd or whipped cottage cheese blends easiest. Use full-fat for a richer wrap or low-fat for fewer calories.

Both work well once blended.

Can I double or triple the recipe?

Absolutely. Blend a larger batch and cook wraps one at a time. Give the batter a quick stir between pours if it sits for a while.

How do I keep the wrap from tearing?

Blend until smooth, pour thin, and cook until it is fully set.

Wrapping Up

This two-ingredient cottage cheese wrap is simple, quick, and versatile. With just eggs and cottage cheese, you get a flexible, high-protein base that fits into breakfast, lunch, or snack time without the carbs of a traditional tortilla.

Keep a few ready to go, change up the seasonings, and mix and match fillings to fit your mood. It’s an easy habit that makes healthy eating feel effortless.

Protein first… because balanced energy is the new glow‑up

Glow-ups used to be all about highlighter and contour, but let’s be real—no amount of makeup beats the radiance of actually feeling good. And guess what? That starts with what’s on your plate.

Forget chasing quick fixes; balanced energy is the ultimate flex, and protein is your wingman. It’s not just for gym bros or keto warriors—it’s the secret sauce for steady energy, fewer cravings, and yes, that elusive “I woke up like this” vibe.
So, why *wouldn’t* you put protein first?

Protein Isn’t Just for Gains (Though, Bonus)

If you think protein’s only job is building muscles, you’re missing the bigger picture. Sure, it helps you lift heavier things (or just carry groceries without whimpering), but its real superpower? Stabilizing your energy levels. Unlike carbs that send you on a sugar rollercoaster, protein digests slowly, keeping you full and focused.

Ever had that 3 p.m. slump where you’d sell your soul for a nap? That’s your blood sugar crashing, not your lack of willpower. A protein-forward snack (think Greek yogurt or hard-boiled eggs) could’ve saved you from the vending machine’s siren call.

The Science Bit (Without the Boring Lecture)

Protein triggers the release of hormones like GLP-1 and peptide YY, which basically tell your brain, *”Hey, we’re good here—no need to raid the pantry.”* Carbs? They spike insulin, which can leave you hangry an hour later. More protein = fewer hunger grenades = you winning at adulting.

Why “Protein First” Beats “Eat Less, Move More”

Old-school diet advice treats hunger like a moral failing. Spoiler: It’s not. Hunger is biology, and protein works *with* your body, not against it. When you prioritize protein, you:

  • Crave less junk (because your blood sugar isn’t doing acrobatics)
  • Preserve muscle (which keeps your metabolism from slowing down)
  • Recover faster (post-workout or just from existing as a human)

FYI, this isn’t about eating steak for every meal. Plant-based? No problem. Lentils, tofu, and even that fancy pea protein powder count.

The “Glow-Up” Effect: More Than Skin Deep

Clear skin, shiny hair, and not looking like a zombie by noon? Yeah, protein’s got hands in all of that. Collagen (hello, skin elasticity) is made of amino acids from—you guessed it—protein. And since protein helps regulate blood sugar, it can also reduce breakouts caused by insulin spikes.

But the real glow? Energy that doesn’t quit. No more relying on caffeine IVs to get through the day. Imagine having *consistent* vibes instead of oscillating between “I can conquer the world” and “I need a nap under my desk.”

Easy Ways to Protein-Fy Your Day

  • Breakfast: Swap sugary cereal for eggs or a smoothie with protein powder.
  • Snacks: Cottage cheese + fruit > a sad granola bar.
  • Meals: Start with protein (chicken, fish, tempeh), *then* add carbs.

Pro tip: If you’re full halfway through your meal, you’re probably doing it right.

But What If I Hate Cooking?

No Michelin stars required. Here’s the lazy (but effective) playbook:

  1. Rotisserie chicken: Rip it apart, throw it on salads, wraps, or just eat it like a feral raccoon.
  2. Pre-boiled eggs: The ultimate grab-and-go.
  3. Greek yogurt: Add honey and nuts if you’re fancy, or just eat it straight from the tub.

Seriously, effort ≠ results. Keep it stupid simple.

FAQ: Protein Myths, Debunked

“Won’t too much protein wreck my kidneys?”

Unless you have pre-existing kidney issues, nope. Healthy kidneys handle protein just fine. The “danger” myth comes from studies on people *with* kidney disease—not the general population.

“Do I need protein powder?”

Only if you struggle to hit your protein goals with food (or you just love the convenience). It’s a supplement, not a requirement.

There is one caveat. If you are using GLP-1 medications, then protein powder is going to be a must-have on your list. Find out more in our quick GLP-1 for weight loss guide, here.

“Can vegetarians get enough protein?”

Absolutely. Beans, lentils, quinoa, tofu, and even whole grains add up. Pair them to get all essential amino acids (like rice + beans), and you’re golden.

“How much protein do I actually need?”

Aim for 0.7–1g per pound of body weight if you’re active. Sedentary? 0.5–0.7g is fine. Don’t overthink it—just prioritize it at every meal.

The Takeaway: Protein is Your Silent Hype Man

Forget restrictive diets and willpower white-knuckling. Protein first isn’t a trend—it’s how your body *wants* to eat. More energy, fewer cravings, better recovery, and yes, that glow-up from the inside out. So next time you plate up, ask yourself: *”Where’s my protein?”* Your future self (and your jeans) will thank you.

High Protein Lunch Recipe : Baked Chicken Meatballs

Lunchtime protein struggles are real. You want something quick, filling, and actually tasty—not another sad desk salad or reheated mystery meal. Enter baked chicken meatballs: juicy, packed with protein, and way more exciting than your usual chicken breast routine. Best part? They’re stupidly easy to make, meal-prep like a dream, and won’t leave you in a 3 p.m. snack coma. Let’s fix your lunch game.

Why Chicken Meatballs Are the Ultimate High-Protein Lunch

**Golden baked chicken meatballs on a white plate**

Chicken meatballs are the underrated heroes of meal prep. Unlike beef or pork, chicken keeps things lean without sacrificing flavor—especially when you bake them. One serving (about 4-5 meatballs) clocks in at around 25-30g of protein, depending on your recipe. Plus, they’re versatile AF. Toss them in a wrap, pile them on greens, or just eat them straight off the tray like a chaotic snack goblin. No judgment.

The Science Behind the Satiety

Protein isn’t just about muscles—it keeps you full longer by slowing digestion and stabilizing blood sugar. Chicken’s amino acid profile also helps with recovery if you’re hitting the gym. FYI, baking instead of frying keeps the fat content in check while still delivering that crispy exterior. Win-win.

Ingredients You’ll Need (No Weird Stuff)

**Juicy chicken meatballs with fresh herbs garnish**

No hunting for obscure ingredients here. This recipe sticks to basics you probably already have:

  • Ground chicken (thighs for more flavor, breast for leaner)
  • Breadcrumbs or almond flour (for binding)
  • Egg (the glue that holds it all together)
  • Garlic, onion powder, salt, pepper (non-negotiables)
  • Optional: grated Parmesan, chopped herbs, or a dash of heat (red pepper flakes, anyone?)

Pro Tip: The Moisture Hack

Chicken can dry out fast. Combat this by adding a tablespoon of Greek yogurt or olive oil to the mix. Trust me, your future self will thank you when you bite into a juicy meatball instead of a sad, crumbly puck.

Step-by-Step: How to Make Them (Without Messing Up)

**Meal-prep container with chicken meatballs and greens**

Even if your cooking skills peak at microwaving leftovers, you’ve got this. Here’s the foolproof method:

  1. Mix everything in a bowl—hands work better than spoons here. Don’t overmix, or the texture gets weird.
  2. Roll into balls (golf-ball size for meal prep, smaller for snacks). Pro move: wet your hands to prevent sticking.
  3. Bake at 400°F (200°C) for 15-20 mins, flipping halfway. They’re done when golden and the internal temp hits 165°F (74°C).

The Golden Rule of Meatball Geometry

Keep sizes consistent so they cook evenly. Uneven meatballs = some raw, some charcoal. Use a cookie scoop if you’re obsessive about precision (we see you, Type A folks).

Meal Prep Like a Boss

**Close-up of baked chicken meatballs with dipping sauce**

These meatballs are meal-prep MVPs. Here’s how to use them all week without getting bored:

  • Salad topper: Throw them on greens with a drizzle of ranch or balsamic.
  • Wrap filler: Add to a tortilla with avocado and hot sauce.
  • Pasta companion: Toss with zucchini noodles or whole wheat pasta.
  • Snack attack: Dip in marinara or tzatziki straight from the fridge.

Storage Tips

They last 4 days in the fridge or 3 months frozen. Reheat in the oven or air fryer to avoid sogginess. Microwave works in a pinch, but IMO, texture suffers.

Variations to Keep Things Interesting

Same meatballs, different vibes. Swap flavors based on your mood:

  • Italian-style: Add oregano, basil, and extra Parmesan.
  • Asian-inspired: Mix in ginger, soy sauce, and scallions.
  • Buffalo: Coat with hot sauce post-bake (bonus points for blue cheese crumbles).

For the Keto Crowd

Skip breadcrumbs and use crushed pork rinds or almond flour. You’re welcome.

FAQ: Your Burning Questions, Answered

Can I use turkey instead of chicken?

Absolutely. Turkey works just as well—just expect a slightly different flavor. Same rules apply: go for ground thigh if you can for extra juiciness.

Why bake instead of pan-fry?

Baking is hands-off, uses less oil, and cooks them evenly. Pan-frying risks uneven cooking and extra calories. But hey, if you love crispy edges, go for it—just monitor the heat.

How do I know when they’re fully cooked?

Use a meat thermometer! 165°F (74°C) is the magic number. No thermometer? Cut one open—no pink means you’re good.

Can I make these ahead and freeze them?

Yep! Freeze pre-cooked or post-cooked. Reheat from frozen in the oven (20 mins at 350°F/175°C) or air fryer (10 mins).

Wrap It Up: Your Lunch Just Got Way Better

Baked chicken meatballs are the lazy person’s gourmet hack. They’re protein-packed, endlessly customizable, and actually taste good—unlike most “healthy” lunch options. Whip up a batch, and say goodbye to sad midday meals. Now go forth and conquer lunchtime like the efficient, well-fed legend you are.

Creamy Pesto Salmon With Roasted Veggies | High Protein Dinner Recipe – Easy, Flavor-Packed Meal

This is the kind of weeknight dinner that feels like a treat but doesn’t ask much of you. Tender salmon bakes in a creamy basil pesto sauce while a tray of colorful veggies turns golden and sweet in the oven. It’s simple, fast, and full of big flavor.

Best of all, it’s high in protein and healthy fats, so you’ll feel satisfied without the heaviness. If you need a reliable go-to dinner, this one delivers.

Why This Recipe Works

Close-up detail: Juicy salmon fillet just out of the oven, coated in creamy basil pesto sauce with l
  • One pan for salmon, one tray for veggies: Everything cooks in the oven at the same temperature, so timing is easy.
  • Creamy pesto sauce keeps salmon moist: A quick mix of pesto and cream coats the fish, preventing dryness and adding rich, herby flavor.
  • High protein, balanced meal: Salmon brings protein and omega-3s; veggies add fiber and vitamins for a complete plate.
  • Roasting boosts flavor: High heat caramelizes the vegetables, giving sweet edges and a satisfying bite.
  • Customizable: Swap veggies, use dairy-free options, or try different pestos without changing the core method.

Ingredients

  • For the Salmon:
    • 4 salmon fillets (about 5–6 oz each), skin-on or skinless
    • 1/2 cup basil pesto (store-bought or homemade)
    • 1/2 cup heavy cream (or half-and-half for lighter)
    • 1 tablespoon lemon juice
    • 1 teaspoon Dijon mustard (optional, for brightness)
    • 1–2 cloves garlic, minced
    • Salt and black pepper, to taste
    • Red pepper flakes, to taste (optional)
  • For the Roasted Veggies:
    • 2 cups broccoli florets
    • 1 red bell pepper, sliced
    • 1 small red onion, cut into wedges
    • 1 medium zucchini, sliced into half-moons
    • 2 tablespoons olive oil
    • 1 teaspoon Italian seasoning or dried oregano
    • Salt and black pepper, to taste
  • To Finish:
    • Lemon wedges, for serving
    • Fresh basil or parsley, chopped (optional)
    • Grated Parmesan, for sprinkling (optional)

Step-by-Step Instructions

Cooking process: Overhead shot of roasted vegetables on a parchment-lined sheet pan at the 10-minute
  1. Preheat the oven: Set to 425°F (220°C). Line a large sheet pan with parchment for the vegetables and lightly grease a small baking dish for the salmon.
  2. Prep the vegetables: Add broccoli, bell pepper, red onion, and zucchini to the sheet pan.

    Toss with olive oil, Italian seasoning, salt, and pepper. Spread in a single layer.

  3. Start roasting the veggies: Roast for 10 minutes to get them going while you prep the salmon.
  4. Mix the creamy pesto sauce: In a bowl, whisk pesto, cream, lemon juice, Dijon (if using), garlic, a pinch of salt, pepper, and red pepper flakes.
  5. Season the salmon: Pat salmon dry. Sprinkle with salt and pepper.

    Place fillets in the greased baking dish, leaving a little space between them.

  6. Sauce the salmon: Spoon the creamy pesto over the top and around the sides of each fillet. Don’t fully submerge; you want some exposed tops for light browning.
  7. Bake everything: Slide the salmon into the oven on the rack above the veggies. Roast 10–12 more minutes, until the salmon flakes easily and reaches 125–130°F (52–54°C) for medium.

    Veggies should be tender with crisp edges.

  8. Optional broil: If you want extra color, broil the salmon for 1–2 minutes at the end. Watch closely to prevent burning.
  9. Rest and finish: Let the salmon rest 2 minutes. Toss veggies with a squeeze of lemon.

    Sprinkle herbs and Parmesan over the top if you like.

  10. Serve: Plate salmon with a spoonful of the creamy pesto from the baking dish and a generous pile of roasted vegetables. Add lemon wedges on the side.

Storage Instructions

  • Fridge: Store salmon and veggies in airtight containers for up to 3 days. Keep the salmon separate from veggies if you can.
  • Reheating: Warm gently in a 300°F (150°C) oven for 8–10 minutes or microwave at 50% power in short bursts.

    Add a splash of cream or water to keep the sauce silky.

  • Freezer: Cooked salmon can be frozen up to 2 months, but the creamy sauce may separate a bit when thawed. Reheat gently and whisk the sauce back together.
  • Meal prep tip: Roast extra veggies and cook a larger salmon fillet to portion for lunches.
Tasty top view: Final plated dinner, overhead composition—salmon fillet nestled in a pool of cream

Why This Is Good for You

  • High protein: Salmon delivers around 22–25g of protein per 4 oz, helping with satiety and muscle repair.
  • Omega-3 fats: Salmon is rich in EPA and DHA, which support heart, brain, and joint health.
  • Fiber and micronutrients: The veggie mix adds fiber, vitamin C, potassium, and antioxidants.
  • Balanced plate: Protein + healthy fats + fiber help stabilize energy and keep you full longer.

Common Mistakes to Avoid

  • Overcooking the salmon: Pull it when the center is slightly translucent and flakes easily. It will finish cooking as it rests.
  • Skipping the pre-roast for veggies: Starting them first ensures everything finishes at the same time.
  • Using watery pesto: Thin, oily pesto can split the sauce.

    Choose a thicker pesto or whisk well with cream.

  • Crowding the pan: Give vegetables space so they roast instead of steaming.
  • Underseasoning: Salt the veggies and salmon well. The creamy sauce shines with proper seasoning and a squeeze of lemon.

Variations You Can Try

  • Dairy-free: Use a dairy-free pesto and swap coconut cream or a barista-style oat cream for heavy cream.
  • Extra protein: Sprinkle pine nuts or toasted almonds over the salmon before serving.
  • Different veggies: Try asparagus, cherry tomatoes, cauliflower, or green beans. Adjust roasting time as needed.
  • Spicy kick: Add Calabrian chili paste or a pinch of cayenne to the sauce.
  • Lighter version: Use half-and-half or Greek yogurt (stirred in after baking to prevent curdling) for a lighter creaminess.
  • Herb swap: Use sun-dried tomato pesto or arugula-walnut pesto for a twist.
  • Grain add-on: Serve with quinoa, farro, or couscous to make it extra filling.

FAQ

Can I use frozen salmon?

Yes.

Thaw it fully in the fridge overnight or under cold running water in sealed packaging. Pat dry before seasoning to avoid excess moisture.

What if I don’t have heavy cream?

Half-and-half works well. For a lighter option, use evaporated milk.

For dairy-free, try coconut cream or a thick oat cream.

How do I know when salmon is done?

Check for an internal temp of 125–130°F (52–54°C) for medium. The flesh should flake with a fork and be slightly translucent in the center.

Can I make the sauce ahead?

Yes. Mix the pesto sauce up to 2 days in advance and store in the fridge.

Whisk before using, as it may separate slightly.

What’s the best pesto to use?

A thicker, high-quality basil pesto works best. Homemade pesto with fresh basil, Parmesan, garlic, pine nuts, and olive oil is great if you have time.

Will Greek yogurt curdle?

It can if baked at high heat. If using yogurt, bake the salmon plain, then gently stir yogurt into the warm pan sauce after baking.

Can I cook everything on one sheet pan?

You can, but keep the salmon on foil or a small section so the creamy sauce doesn’t run into the veggies.

It’s cleaner to use a separate small baking dish for the salmon.

In Conclusion

Creamy pesto salmon with roasted veggies is the kind of dinner that feels special but fits into a busy week. It’s quick, customizable, and balanced, with a rich sauce that keeps the salmon tender every time. Keep pesto and a bag of veggies on hand, and you can pull this off whenever you need a high-protein, crowd-pleasing meal.

A squeeze of lemon, a sprinkle of herbs, and dinner is done.

Beauty close-up: Spoon drizzling silky creamy pesto from the baking dish over a resting salmon fille